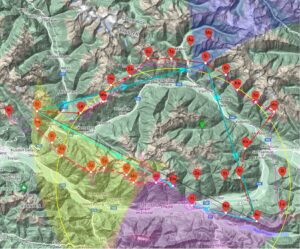
Cross country videos are a great thing, but it’s better if you know where the pilot is flying. And it would be even better if certain data is displayed in the video, such as altitude, speed, etc. You can find out how XC Track works in this article.
I’ve often been asked how I do the overlays in my videos, you can find an example in this video. I use XC Track for this. XC Track is an Android app that is intended to display all possible flight data in flight, such as altitude, speed and increasing or decreasing air masses as a value, as well as other data such as airspace and maps. It is therefore a good idea to use the app to make videos with this data more interesting.
In order for the app to run on Windows, you need an Android emulator, such as the MEmu. MEmu can be downloaded free of charge from the Internet. The emulator must be run with administrator rights after installation.
Note 1: Android apps are supposed to run natively on Windows 11, but I couldn’t test that because I don’t have Windows 11.
Note 2: The text enclosed in quotation marks below can be found in the respective menus and dialogs of the respective software.
Note 3: I’m using german Windows 10, the translation below could be wrong.
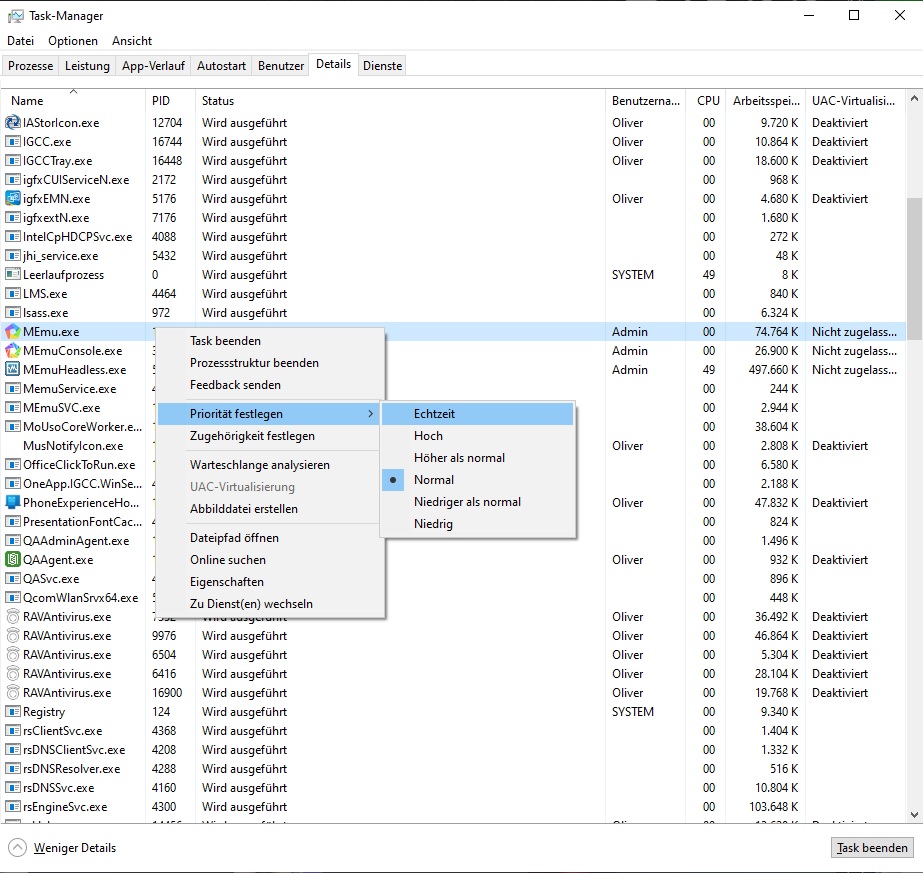
Since it is important that the XC Track video is as synchronous as possible with the Actioncam video, it is advisable to set the priority of the “MEmu.exe” application in the task manager to “real time”.
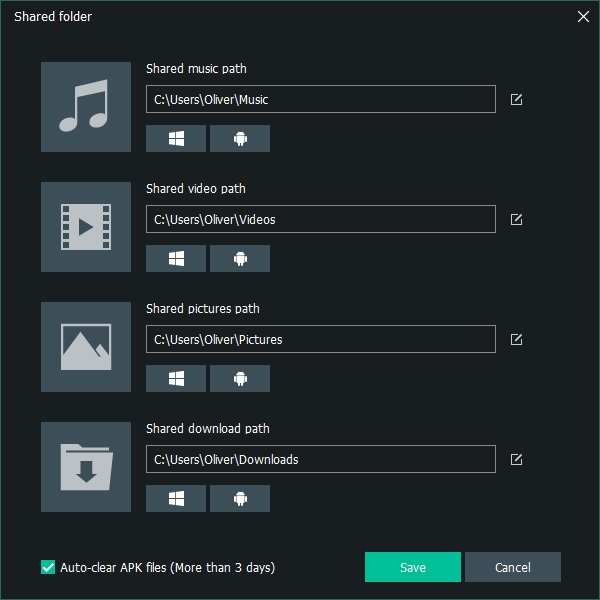
The download path for file exchange between Windows and Android can be set under “Shared folder”. Further settings can be made depending on your own preferences. Under “System Settings” – “Display” I set HD resolution “1920 x 1080” and a “Frame rate” of “25 FPS” to have the same settings as the Actioncam video. Furthermore, the language “English” is set under “Preferences”, since I use the corresponding language in my videos.
In Android, you still need to install XC Track from the Google Play Store. I have the Pro version which costs a donation of €12 per year. I think it’s worth the money to support the further development of the app and you get more settings and widgets that could be good for a successful video. A friendly request to the developer Jaroslov Balás that you want to use XC Track in your videos can’t hurt.
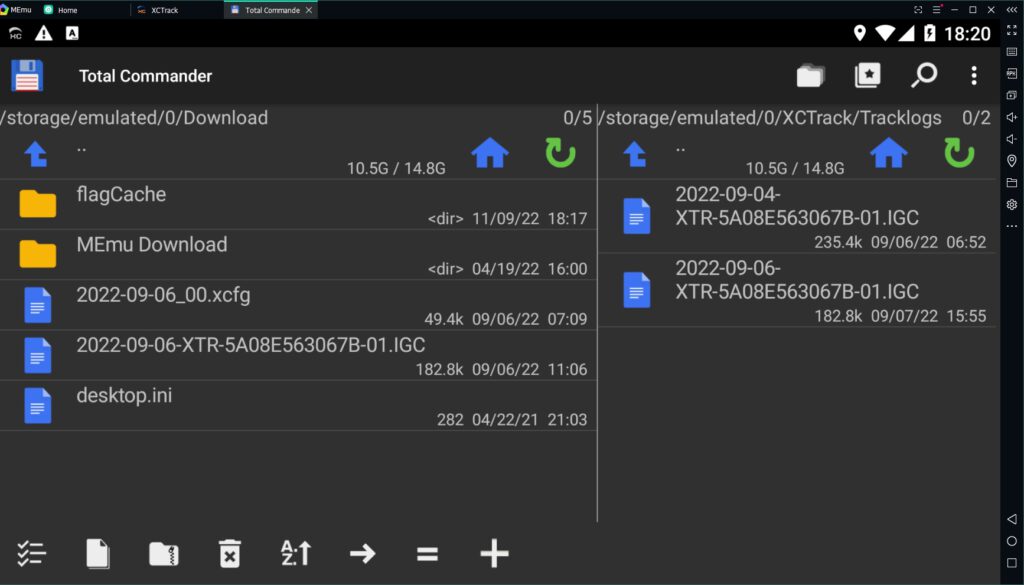
With a file manager under Android you can copy the files from the download folder, which you previously stored there under Windows, to the XC Track folder. The igc file recorded in flight must be copied to the “Tracklogs” folder and the XC Track configuration to the “Config” folder. The configuration I used can be downloaded here:
The file must then be renamed to .xcfg.

The configuration can of course be changed according to your own wishes, XC Track is known for the very flexible configuration. If you are new to XC Track, here is a complete guide.
Setting the time correctly is a bit tricky. The time and time zone must be set in the Android settings, it works for me if I deactivate the “Automatic time zone” and set it to “GMT+01:00” under “Select time zone”.
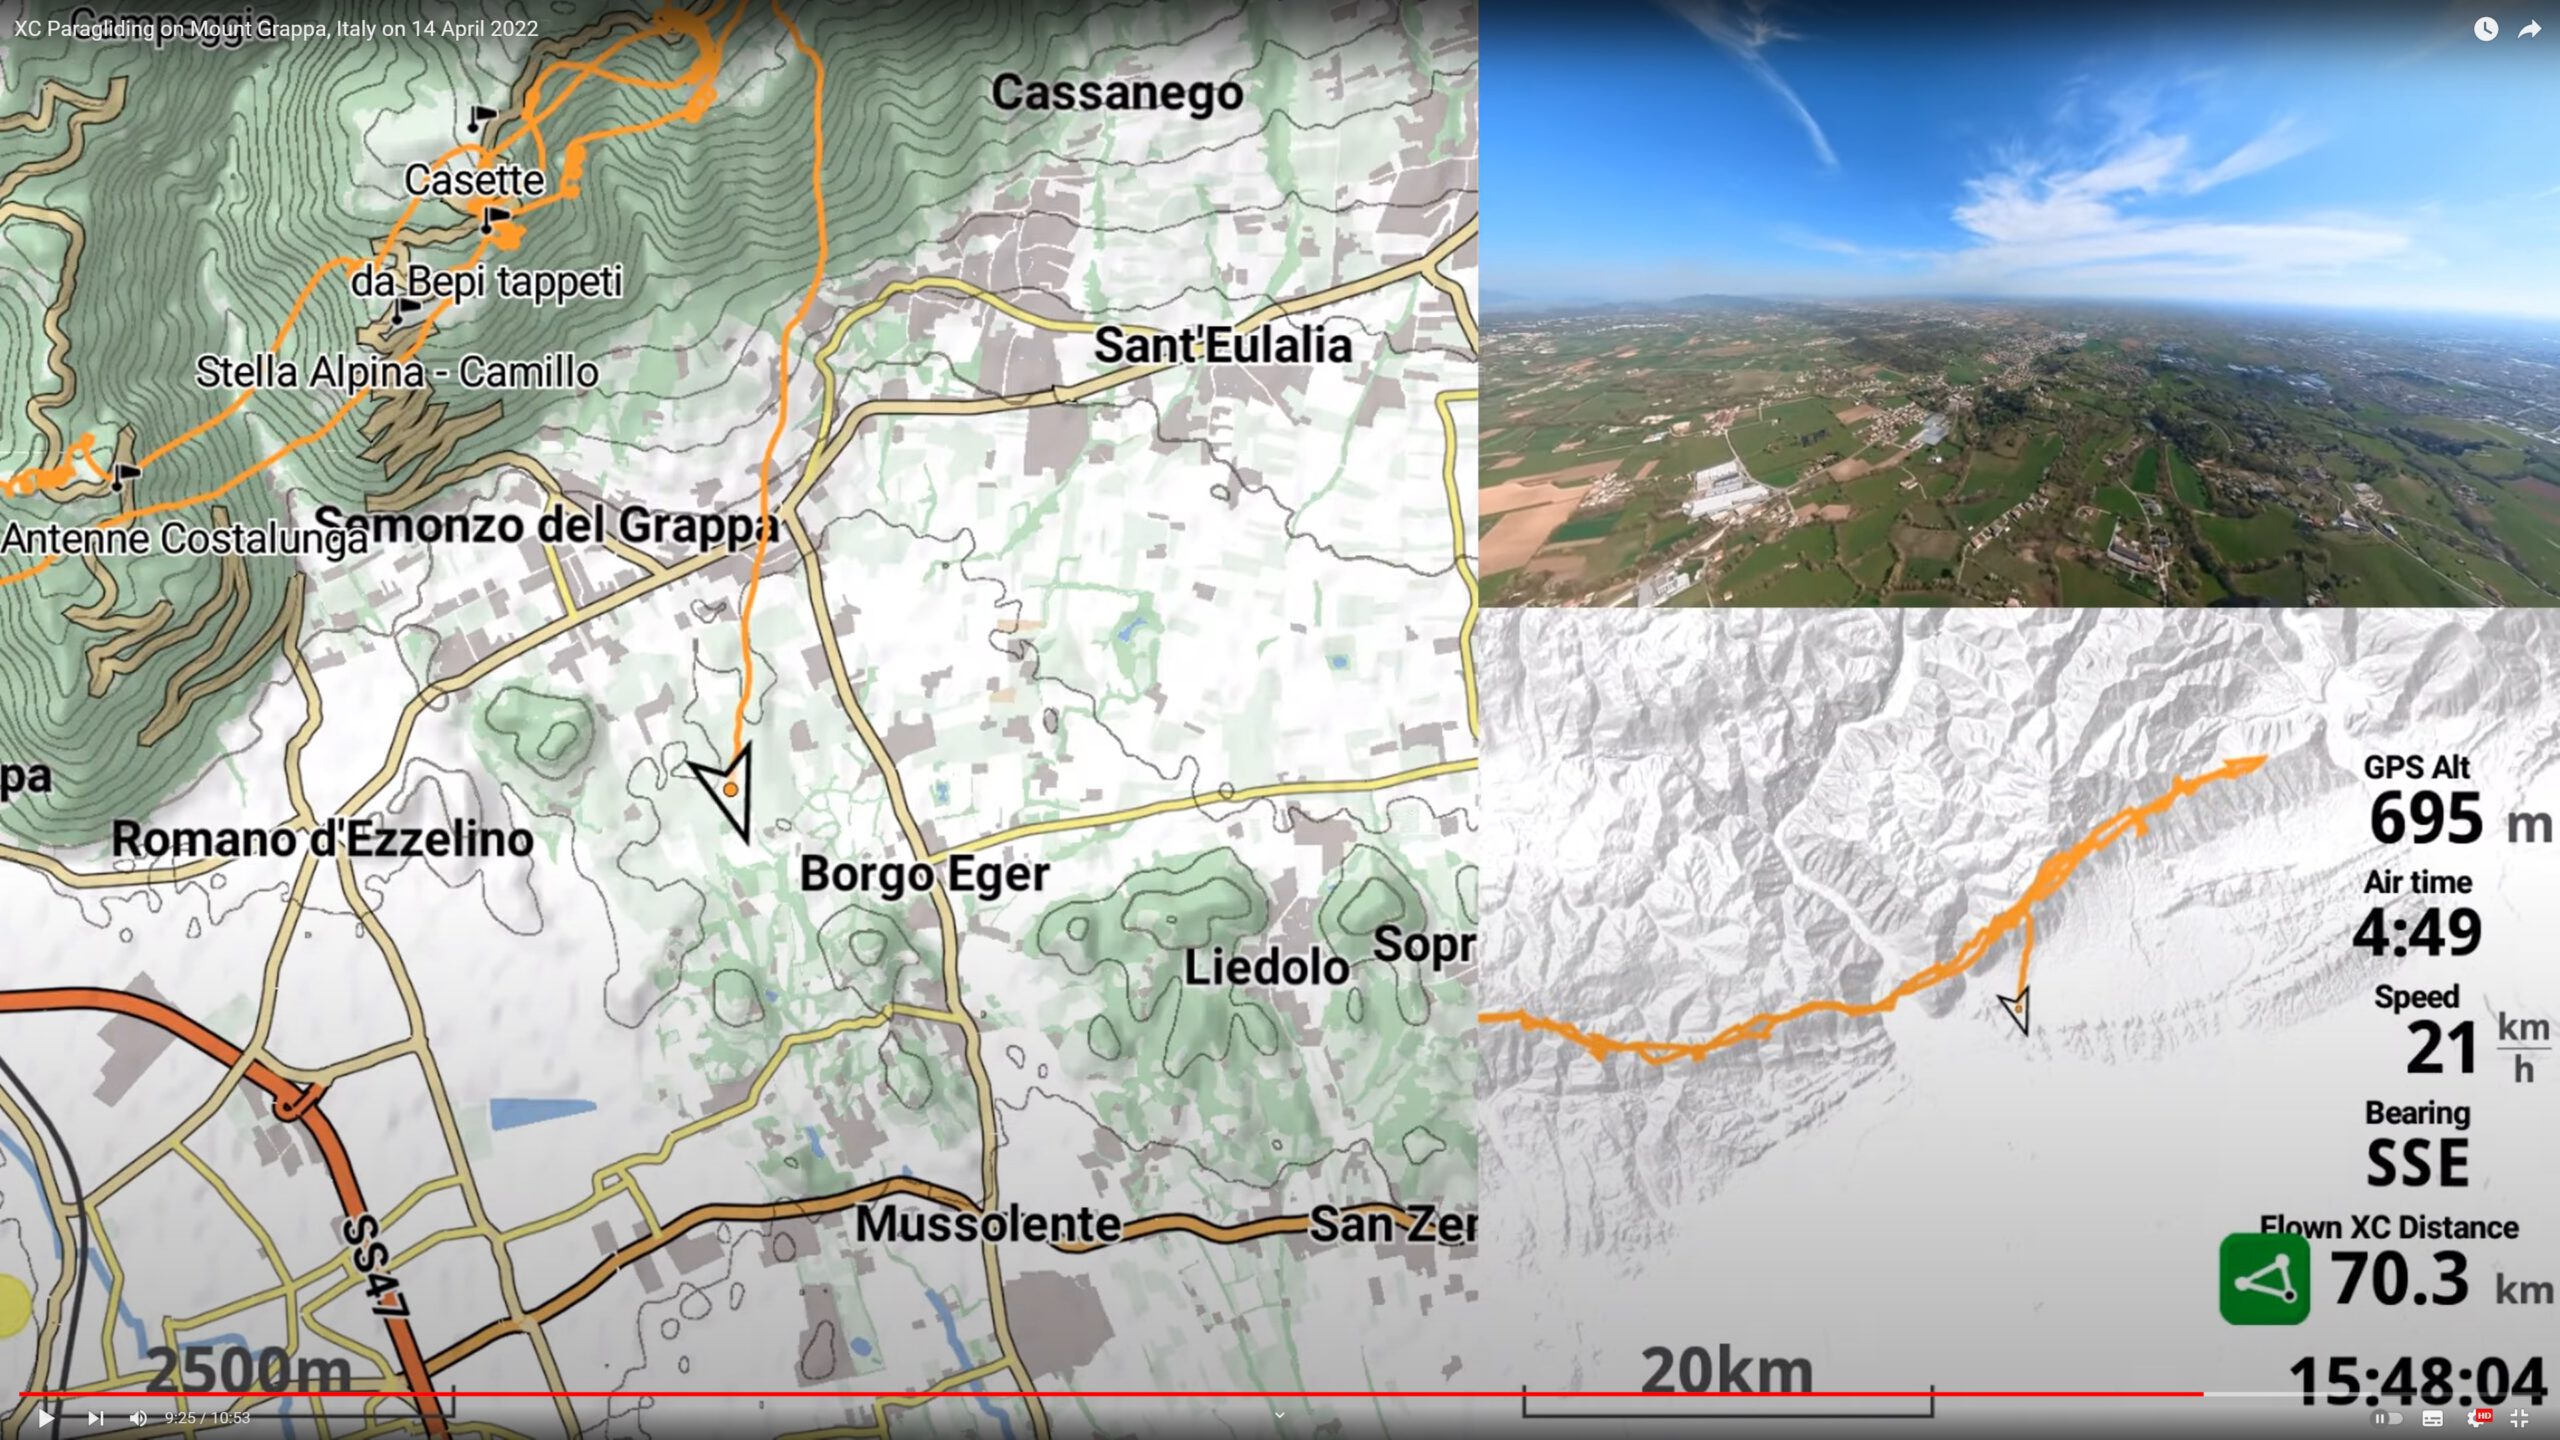
The large white box in the picture is later intended for the Actioncam video.
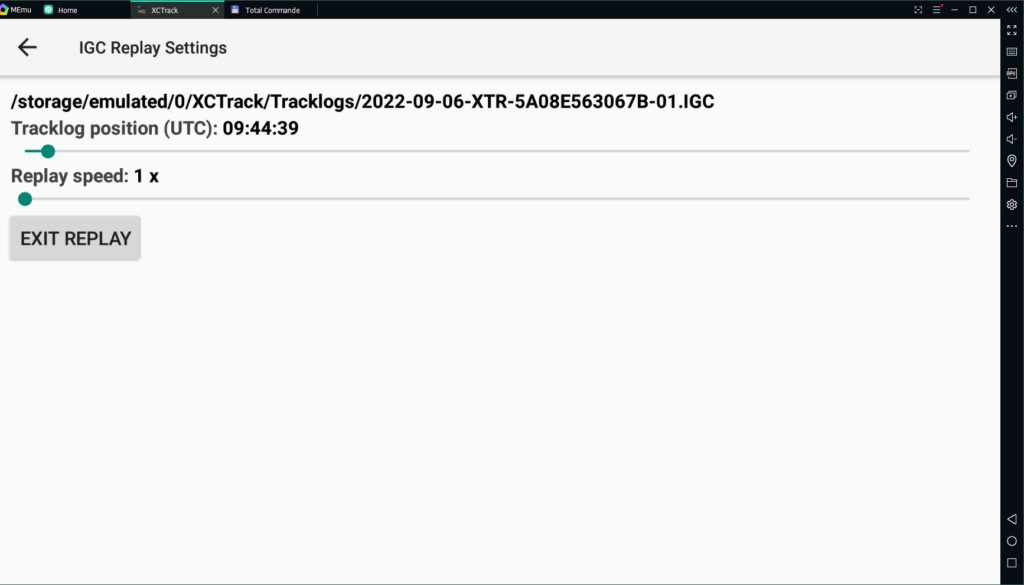
If you want to create a hyperlaps video, it is possible under “IGC Replay Settings” to set the “Replay speed:” to the same speed as the later video. This saves a lot of hard drive capacity and time, but video sections with different speeds are then no longer so easily possible.
With the “Screen recorder” integrated in MEmu, the XC track video can now be recorded. Theoretically, you could continue working with the computer as usual, but since the XC track video should be as time-synchronous as possible with the actioncam video (hence the “real-time” setting, see above), this is not recommended. It is best to let the computer create the video in peace, it can take as long as the flight if you have set “Replay speed:” to “1 x”. Unfortunately, MEmu is a bit buggy, so that some video recordings fail. The only thing that helps here is to try again.
The video created in this way can then be combined with the Actioncam video in your video editing program. I use Magix Video deluxe Premium. I will spare myself a further explanation of how to create the video at this point, just a few tips below:
Tip 1: If the video is to be time-synchronized, make sure that the videos are saved after a certain time with the usual action cams. With my Insta360 ONE X2, this results in video gaps of 17 to 18 seconds after every 29 minutes, which must be taken into account when synchronizing the 2 video tracks. If you create a hyperlapse video, the gap is reduced to around 1.1 to 1.2 seconds at 16x speed, for example.
Tip 2: In order to synchronize the Actioncam video and the XC Track video in less than a second, it is helpful to use the time stamp from the Actioncam video creation date and the time displayed in the XC Track video for comparison. Therefore it makes sense to show the time in the XC track video. In order to synchronize the videos even more precisely, I look for significant course changes in the Actioncam video, to which I can then synchronize the XC track video.
Tip 3: If you want to display the XC track data directly in the video, as in this video, you can do this using the “Chroma Key” effect.
Tip 4: If you want to reduce the size of the Actioncam video, as in this video, you can use the “Position/Size” effect. Here you have to deal with synonymous topic “keyframes”.
Tip 5: If you want to create a hyperlapse video and also use the Insta360 ONE X2, it is better to use the Insta360 Studio app, the video quality is definitely better than using the speed effect in the video editor. Object tracking in Insta360 Studio also works very well.