
I’ve been using the Insta360 ONE X2 for my in-flight recordings since early 2021. The question that occupied me from the beginning was how and where is the best place to mount the action cam. Safety should come first, that’s clear. But of course it should also offer a good all-round view in order to fully exploit the possibilities of 360° recordings. I first opted for a 45° forward-facing mount, similar to what Sebastian Benz did in this Video demonstrated. However, I attached the selfie stick to the carabiner and harness with cable ties so that I don’t have to do the assembly during the flight like Sebastian does.
The disadvantage of this montage is that in Hyperlapse mode the pilot scurries past in the video while thermalling. That bothered me, so my considerations were to mount the action cam downwards. The result can be seen in this Video.
I came up with a mount that is shown in the following photos:
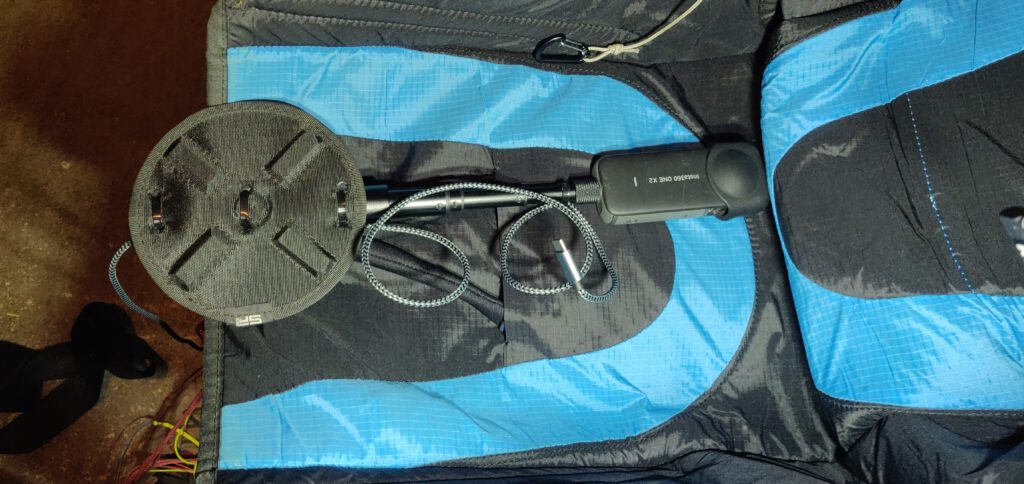
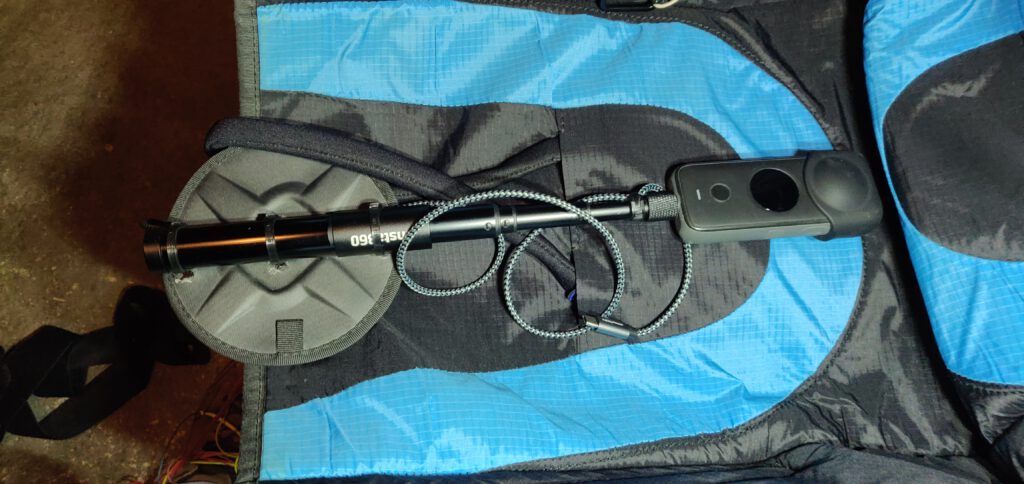
I attached a magnetic mount (e.g. Hama Flexible Magnetic Mount for GoPro, “Flex”. I have a different make, but the ones from Hama seem to be identical) to the original Insta360 selfie stick (length 70 cm) with three high-quality cable ties . So-called Cobra cable ties are an advantage, as they do not have the annoying knob compared to normal cable ties. To do this, the magnetic mount must be provided with six holes for inserting the cable ties. The GoPro mount can be unscrewed. In addition, I attached a 1.50 m USB-C cable to the top end of the selfie stick with a cable tie. A USB cable with nylon insulation is recommended, as our sport sometimes tends to be a bit more robust. Cannot be seen in the picture, I also attached a carabiner to the USB cable with a rubber cord, which should serve as a last backup in case the magnetic mount “fails”.
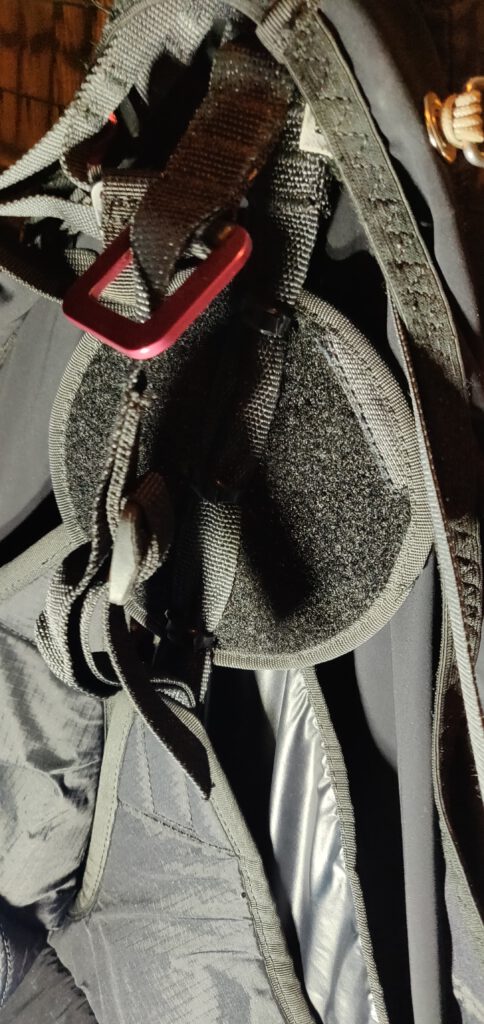
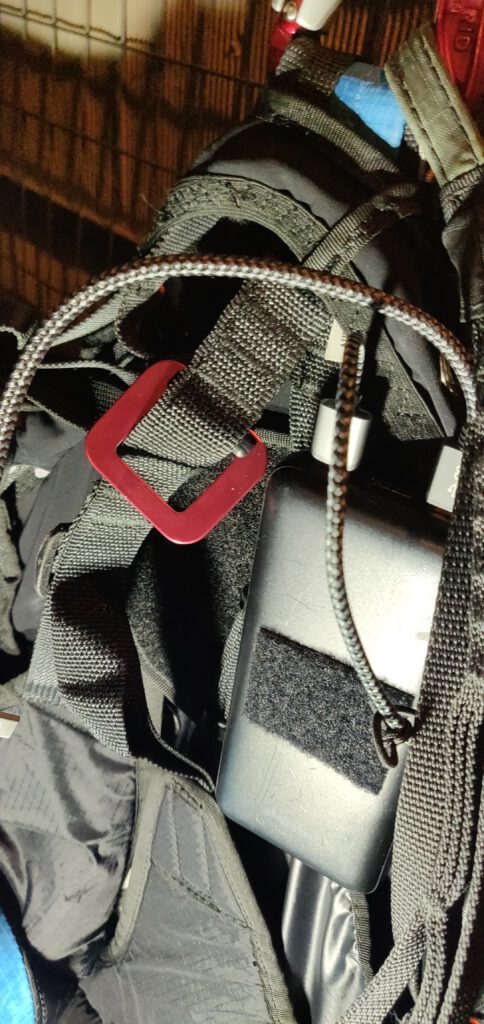
The counterpart of the magnetic mount is attached to a strap in the harness directly under the carabiner with three cable ties. To do this, six holes must also be drilled into the magnet holder. Since the magnetic holder is equipped with Velcro, it can also be used as a holder for the power bank. I have mounted a magnetic mount on both sides, so I can mount the action cam on the right or left, depending on where the mountain range I want to record is located.
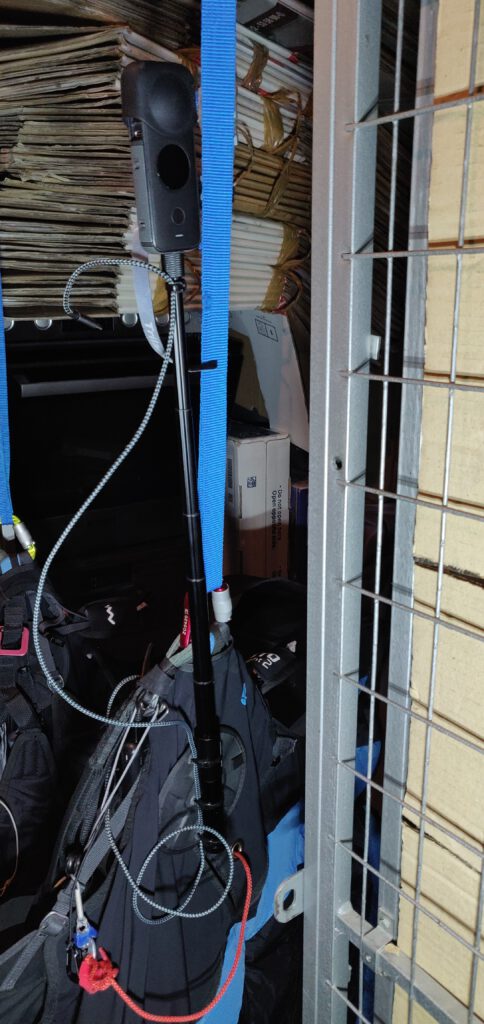
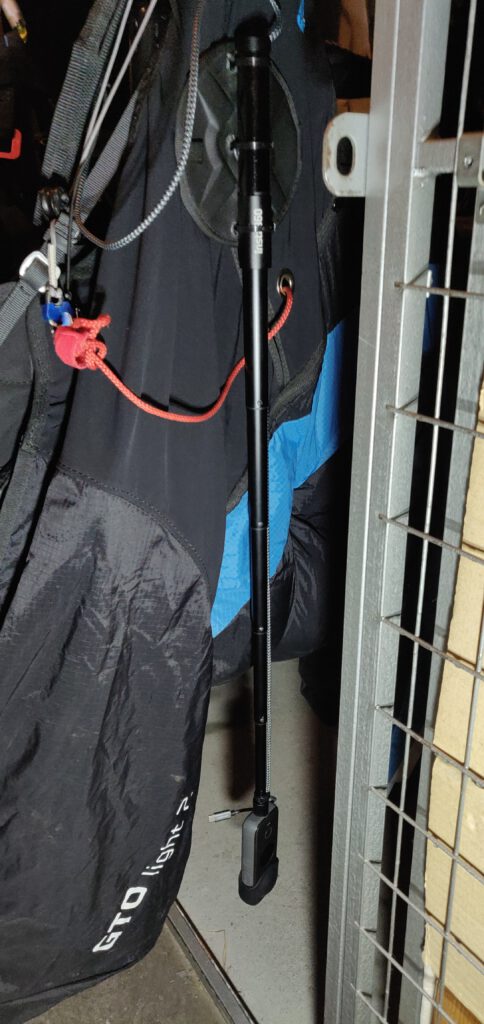
You can see the end result in the last two pictures, you have the choice to point the selfie stick up or down during the flight. During flight, the accelerator is behind the selfie stick. I think the selfie stick will be retracted and pointing upwards when taking off, and then extended and pointing downwards later in flight.
Conclusion: After a lot of trying, I hope to finally have found a good solution for mounting the Actioncam. On the one hand, the solution ensures maximum safety, if lines should become tangled in the action cam, the magnetic holder will simply come loose. On the other hand, the positions of the action cam described are very well suited to making maximum use of the possibilities of 360° recording.
Note: The suspension is only suitable for a short selfie stick and not too heavy actioncam.


Pingback: Suspension of my 360° Actioncam - modified - Ad Nubes | Paragliding Blog