What do we need to bear in mind when approaching airspace that we are not allowed to fly into? What altitude should you set on your aircraft? What should you do if you have inadvertently flown into a prohibited airspace? Georg Bube, an experienced cross-country pilot, will try to answer all these questions in a presentation.
The lecture took place online on 24.09.2024. The speaker is Georg Bube. The following article is my interpretation of the lecture and therefore differs in parts from the lecture and is not a complete reproduction of the lecture, but is heavily abridged.
Preparation
The following tips will help you prepare for the flight:
Be familiar with your devices
What information is displayed where and how the devices are operated.
Do your homework before the flight
The airspace structure should be studied before the flight and NOTAMs should also be consulted. If necessary, download road maps if you are flying in unfamiliar areas. Road maps are particularly important in lowland areas, as there is no terrain to orientate yourself by.
Flying with foresight starts with planning
In lowland areas, it is particularly important to familiarise yourself with the airspace structure in advance, as this can block a possible flight path. This can lead to having to end a flight prematurely. Even in flight, you should remember to take the appropriate direction in good time in order to avoid such airspaces.
Deactivate released airspaces before the flight
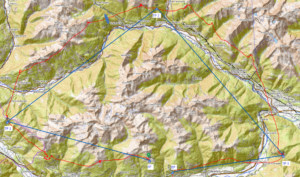
Airspaces should be activated if cleared. This is particularly interesting for TRAs, e.g. if you want to fly the Karwendel triangle. The example shows how to activate TRA LOWI C in XC Track. The advantage is that you do not have to activate the airspace in flight, otherwise there will be an airspace alarm in flight. Unfortunately, the activation of the TRA by Austro Control is not automatically taken over.

Challenge in flight
It is not possible to descend and climb at will. When flying over airspace and descending more than expected, there is no option to avoid sinking into the airspace. Think carefully before flying over airspace.
Wing control should be well mastered in turbulence. Distractions should be avoided, such as a vario that is set too sensitively and other things like taking photos or chatting.
Active height control
When climbing, we have several options available, unlike when descending. When descending, you can try to fly into areas with lower sink rates if necessary.
Put on your ears
One way of moderately increasing the sink rate. Disadvantage: relatively high material load when the wing is stretched. With some glider types the ears beat. The hands are not free. Advantage: The flight direction is maintained.
Steep spiral
Disadvantage: Is associated with high physical strain in the form of g-forces. Performance depends on your form on the day, whether you can cope well with the spiral and what sink rates you achieve. Advantage: Very effective means of destroying altitude.
Accelerated flight
The sink rate increases with accelerated flight. Advantage: direction is maintained and you make rapid progress. Moderate sinking (in combination with putting on your ears).
Line and route selection
The routes describe the choice of flying above the ridge or below the cloud when climbing is required. If you want to descend, you should fly in front of the ridge or to the side of the clouds.
Training
Spiral dives in turbulent air are much more difficult compared to safety training in calm air over the lake. Tip: Spiral dives and the other descent methods should be practised regularly, e.g. on the local mountain where the airspace is clear.
Height measurement
The following methods of height measurement exist:
GPS altitude
The horizontal position is very accurate, but the altitude measurement is not accurate enough for aviation and is therefore not used there, but the air pressure is.
QNE pressure
The QNE pressure or the pressure level above the pressure surface of 1013.25 hPa at sea level, the so-called ICAO standard atmosphere.
QNH pressure
The QNH pressure is the current local pressure reduced to sea level using the ICAO standard atmosphere (“Nautical Height”). If it is set on the altimeter as the ground pressure, the altimeter shows the approximate height of the aircraft above sea level (source: Wikipedia).
Airspace boundaries
Altitude above sea level
Altitude data in QNH, i.e. to maintain the altitude, the QNH pressure from the nearest airport must be set. Example: 9500 ft AMSL (Above mean sea level) between the Rofan mountains and the Unnütz.
Flying surface
The second variant is the so-called flight level. Flight level 100 applies almost everywhere in the lowlands, except in the vicinity of airports. This is the pressure according to QNE (ICAO standard atmosphere). The term flight level is derived from the fact that the pressure in the standard atmosphere at a certain altitude represents a surface. As the pressure can vary depending on the location, the flight level does not necessarily describe a geometrically flat surface. If aircraft have the QNE value set correctly and the altimeter is properly calibrated, they will display the same altitude, which is important in aviation to avoid collisions.
These limits are higher on high-pressure days, as the pressure at altitude on days with a standard atmosphere is at 10000 ft, for example, and is higher on high-pressure days. On low-pressure days, the limit moves downwards, so on such days you can fly less high in real terms.
The dilemma
The IGC specification stipulates that the altitude is written in GPS and QNE altitude. The QNH altitude is missing in the IGC file, but this is the altitude that is actually required for the airspaces with altitudes in ft (AMSL). The correct altitude, if supported by the altimeter, can only be seen by the pilot during the flight. This means that this file is unsuitable for checking airspace violations using the IGC file.
If you only fly according to GPS altitude when the pressure is low and the flight levels move downwards, it can easily happen that you violate airspace. Fortunately, we tend not to fly en-route on days with low pressure, as the conditions usually don’t allow it.
Possible scenarios
The following scenarios are conceivable for flying into airspace that is prohibited for us:
- Horizontal entry into the airspace, i.e. lateral entry
- Vertical entry into the airspace
Which widgets?
All of the following information relates to the Android app XC Track.

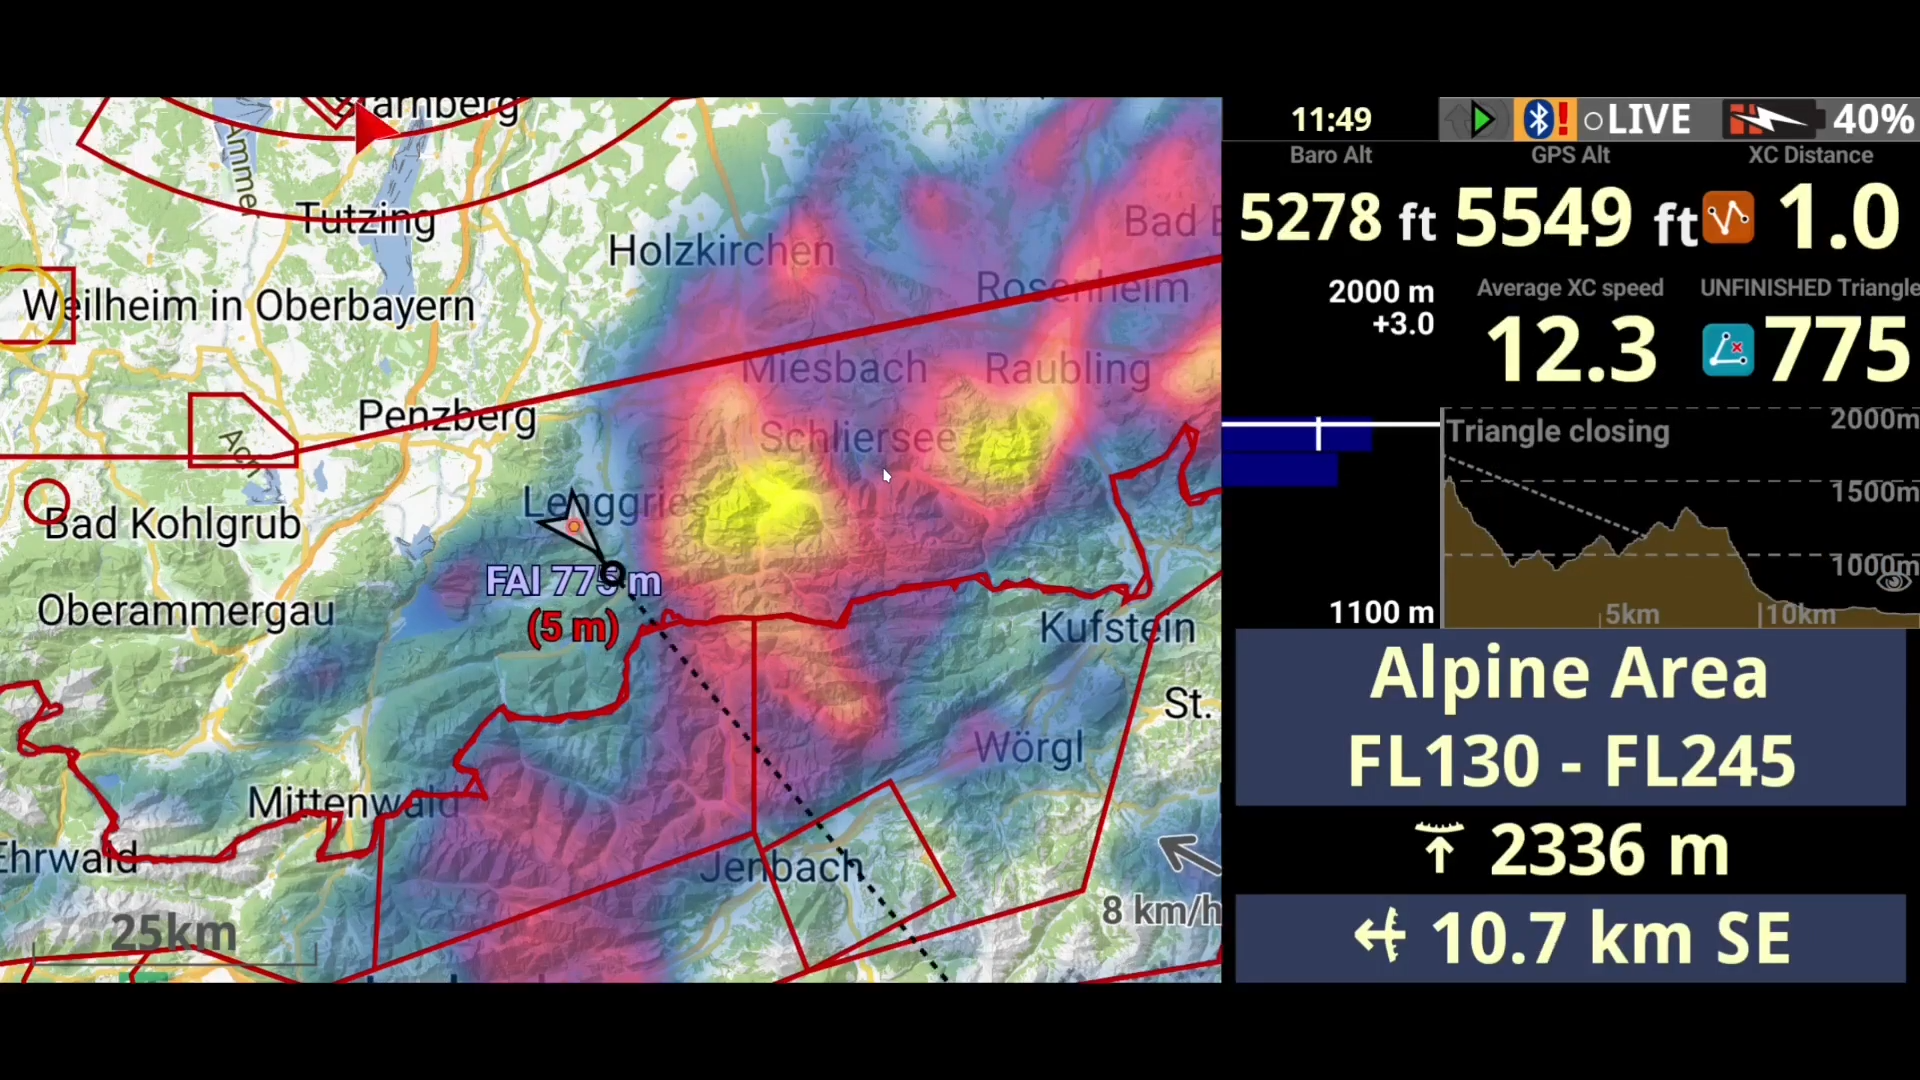
Maps with top view
To avoid horizontal airspace violations, charts with a top view are best suited. Good preparation is an advantage, as you will already know how high you can fly in which area without looking at the map.
Airspace widget
An airspace widget shows the horizontal and vertical distances in numbers to the airspaces in the neighbourhood. This can help us to avoid horizontal airspace violations, as we can see how the distance is getting smaller. Also the vertical airspace violations upwards or downwards, as we can then see how much airspace we still have upwards or downwards.
Side view
The side view shows the cross-section in the direction of flight. You can see the terrain to roughly estimate whether you can still cross a mountain ridge. It can also be used to see whether you can cross an airspace. It can also be used if you have an airspace that you need to fly under.
During the flight
Zoom in on map with horizontal approach
What options are available during the flight if you get close to airspace? During the flight, the map should usually be zoomed out a little further in order to have an overview of the terrain and a wider view in general. When approaching airspace, especially when approaching horizontally, the top view of the map should be used to zoom in and, in case of doubt, to zoom in quite far.
Always monitor the altitude under an airspace
If you fly below an airspace, you should constantly monitor your altitude, especially if you are at a higher altitude and approaching the airspace. Permanent monitoring of the airspace and altitude enables you to take measures to regain more distance in case of doubt, such as spiralling.
Set distance limits for active measures
It makes sense to set distance limits for the initiation of active measures. For the speaker, this is usually the spiral. However, the disadvantage of the spiral is that you remain stationary and if it rises where you are performing it, then you will rise as soon as you exit the spiral. On the one hand, because the air rises and, on the other hand, when you exit the spiral, you rise a little anyway, depending on how cleanly you have exited it.
If the airspace is indicated in feet above sea level, at 500 feet at the latest, or if the airspace is indicated in flight level, at 200 metres below the airspace at the latest, it is recommended to reduce the altitude. It can happen that when flying straight ahead, the air rises even higher and there is a risk of entering prohibited airspace.
Maintain an overview, plan ahead (zoom out on map)
You should keep an overview and plan ahead, i.e. zoom out on the map and get an impression of the bigger picture. This is particularly useful in situations such as in the lowlands, where you can start to avoid major airspace restrictions in the vicinity of airports in good time.
Check the limits again
The airspace boundaries should be checked constantly, especially if you are not sure where the boundaries are. Especially in the lowlands, when flying with a tailwind and possibly realising late that a prohibited airspace is in the way, it is important to take evasive action early on.


Pingback: The IGC format - Ad Nubes | Paragliding Blog
Pingback: My XC Track settings - Ad Nubes | Paragliding Blog
Pingback: XC Track - Tips and Tricks Part I - Ad Nubes | Paragliding Blog