XC Track offers a very wide range of functions. I would therefore like to offer tips and tricks for XC Track in this series. I compiled the tips and tricks as part of an internal club seminar, but I have also included some tips from fellow club members.
Of course, I can’t provide a complete guide in this article, but a very comprehensive description of XC Track can be found on the AIR3 website.
You can watch a recording of the XC Track seminar here (in German).
Preferences
Pilot
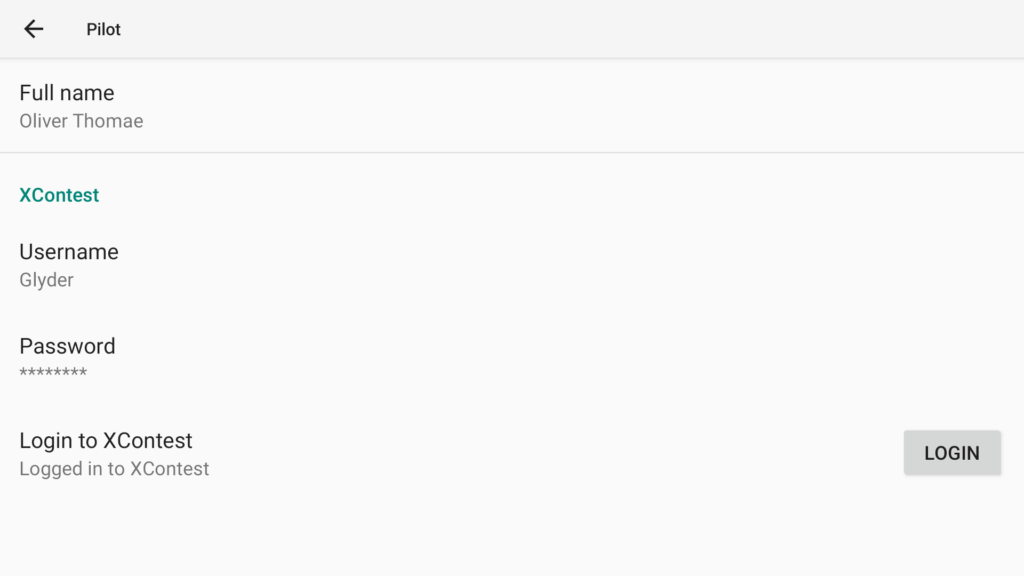
The XContest login data can be entered in the Pilot dialogue.
This makes it possible to upload the IGC file to XContest automatically or manually after landing.
It is possible to follow other pilots or other pilots. This is helpful if you want to follow other, perhaps better XC pilots or fly in a team. The prerequisite is that Share my position is activated when the app is started.
Aircraft
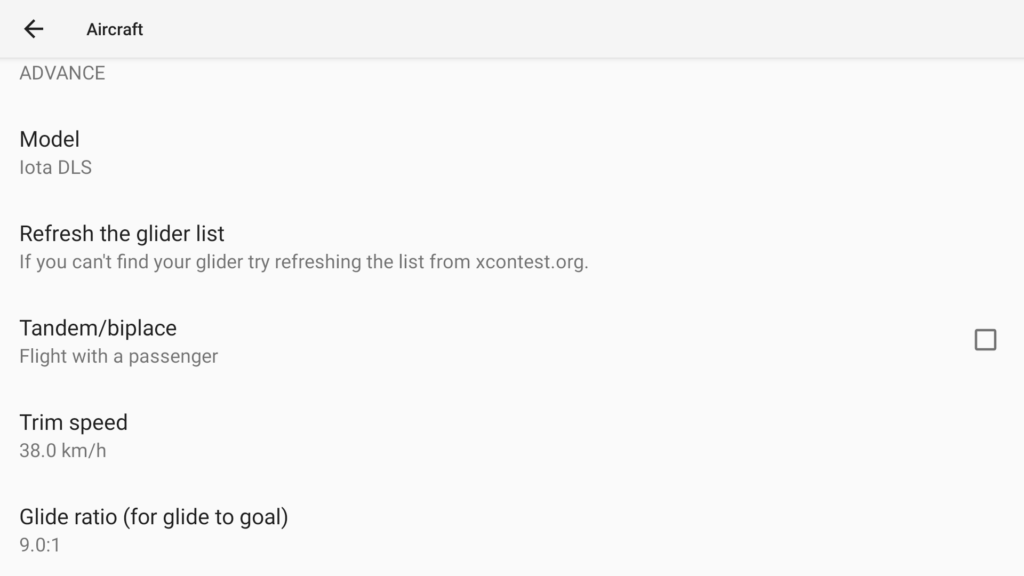
The data is used on XContest if the flights are uploaded there. The Glide ratio parameter is used in various widgets, e.g. Side View, and should therefore be set correctly depending on the glide ratio of the glider.
Live tracking
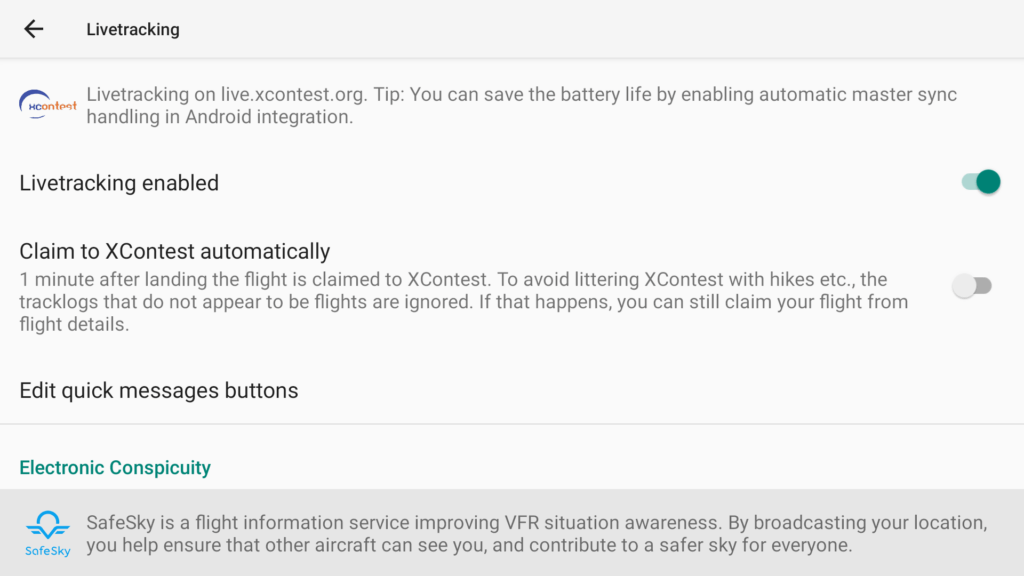
If Share my position was activated when starting the app, Live tracking enabled is active in the Live tracking dialogue. This makes it possible to track you in flight, which increases safety.
The FLARM ID can be entered below if you have a vario with FLARM connected via Bluetooth. The ID is entered automatically for the AIR3 with integrated FLARM.
Flying with FLARM is definitely recommended, as the gliders can see us and take evasive action in the event of a collision course.
Altimeter/QNH settings
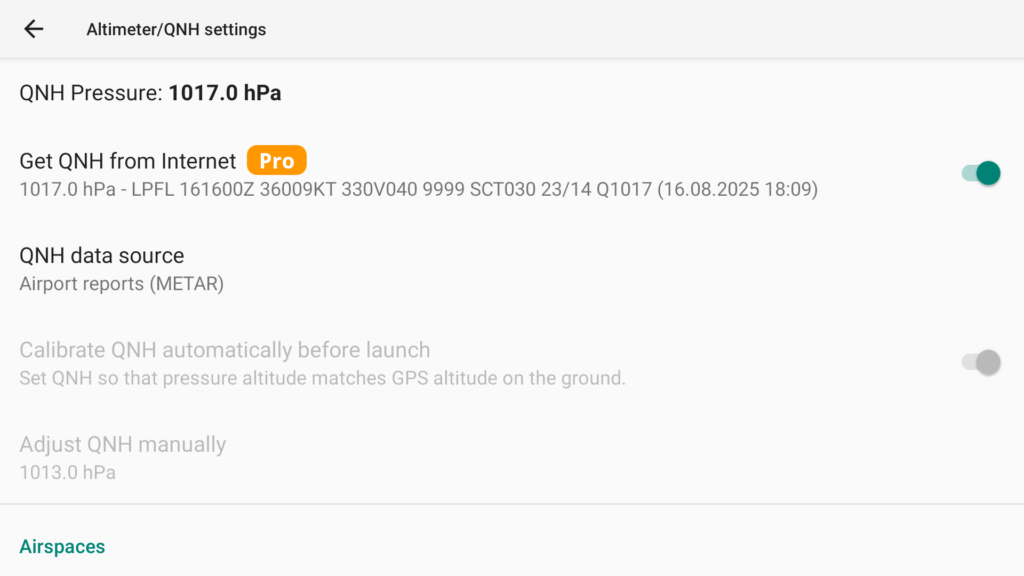
If Get QNH from Internet is activated, the QNH data is retrieved from the nearest airport or weather station depending on the setting. This function is important for airspaces with limits in feet and the QNH altitude to avoid airspace violations. The background is explained in the article Georg Bube – Navigating through airspaces.
If you want to avoid risking an airspace violation when uploading the IGC file to DHV-XC, you should activate the parameter Force use of GPS altitude. Some competitions require this parameter to be activated.
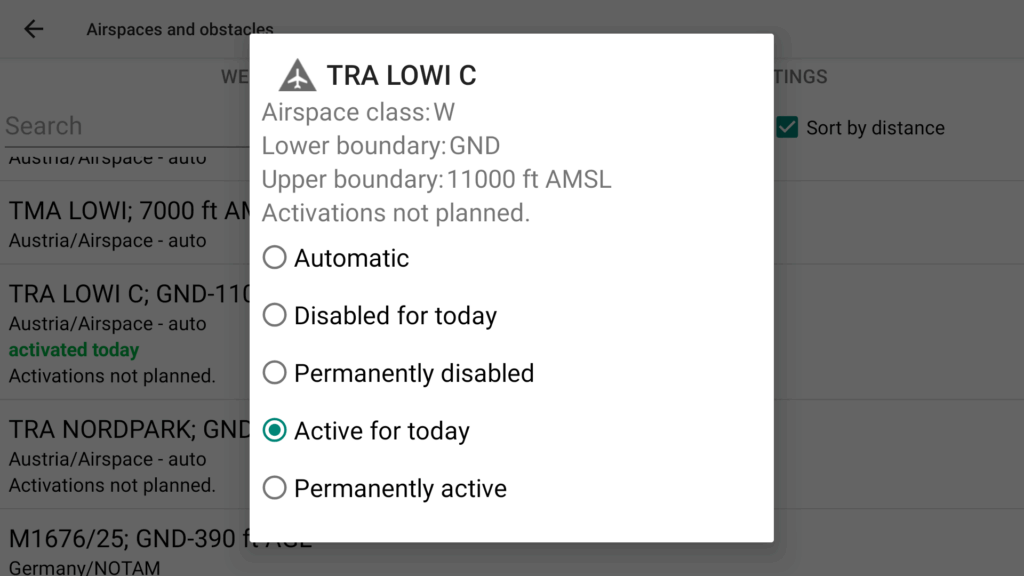
Airspace and obstacles
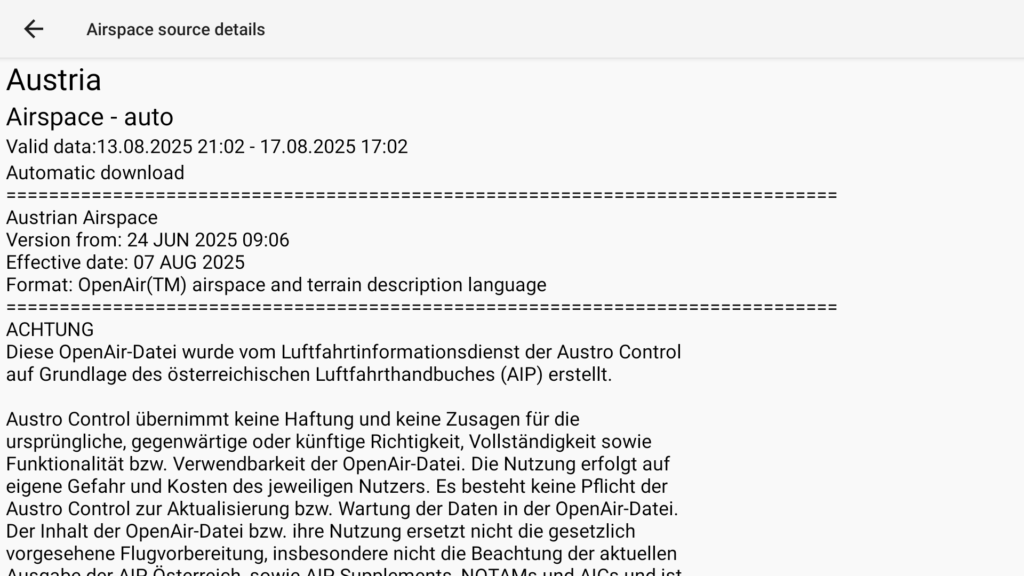
It is advisable to check whether the country has been activated and downloaded before the flight. To be on the safe side, the Refresh button should be clicked before take-off. Click on the country to check the data in the Airspace source details dialogue.
The airspace data is downloaded from the XContest platform. As the data is maintained there by hand, the airspaces are naturally not 100% reliable.
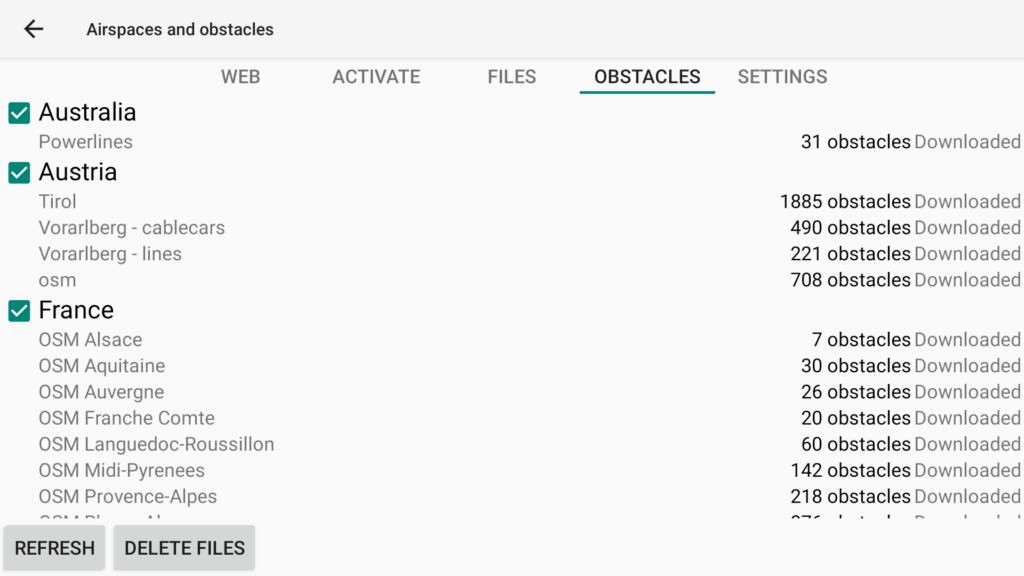
In the Airspaces and obstacles dialogue, warnings about mountain and material runways and power lines can be activated.
Caution: The warnings are not 100% reliable. Ropes for material conveyors for timber transport in particular can be tensioned at short notice.
Practical experience has shown that although the obstacle was stored, the position was not correct or obstacles were missing.
NOTAMs also contain obstacles that must be observed. Therefore, check the NOTAMs before every flight.
Maps
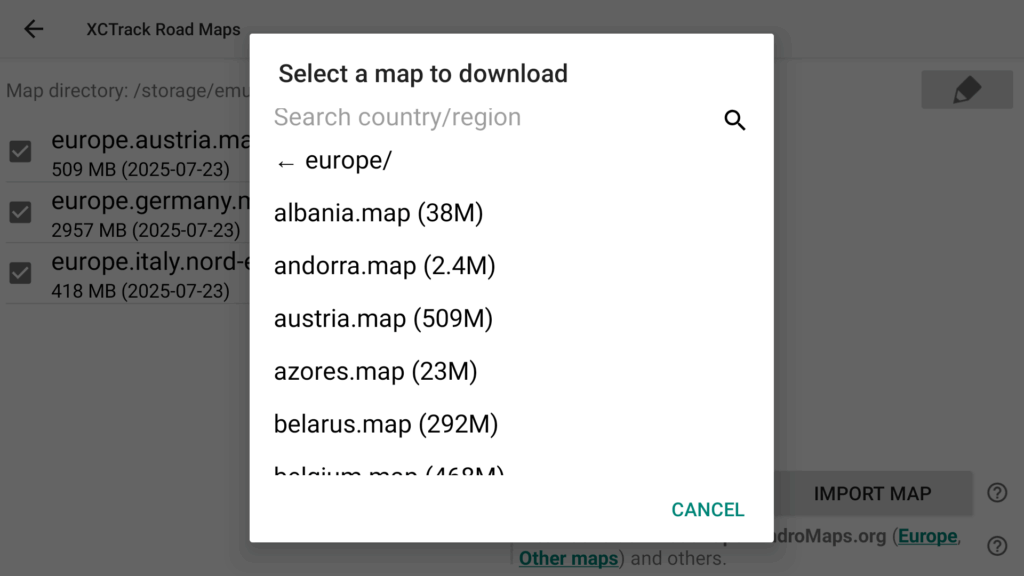
Maps with terrain features such as mountains, roads, cities and railway lines can be displayed in the XC Map widget. To do this, you need to download the maps of the region in which you want to fly.
Alternatively, to save memory space and if you are only flying in the Alps, you can download the map of the Alps at https://www.openandromaps.org/downloads/europa.
Display
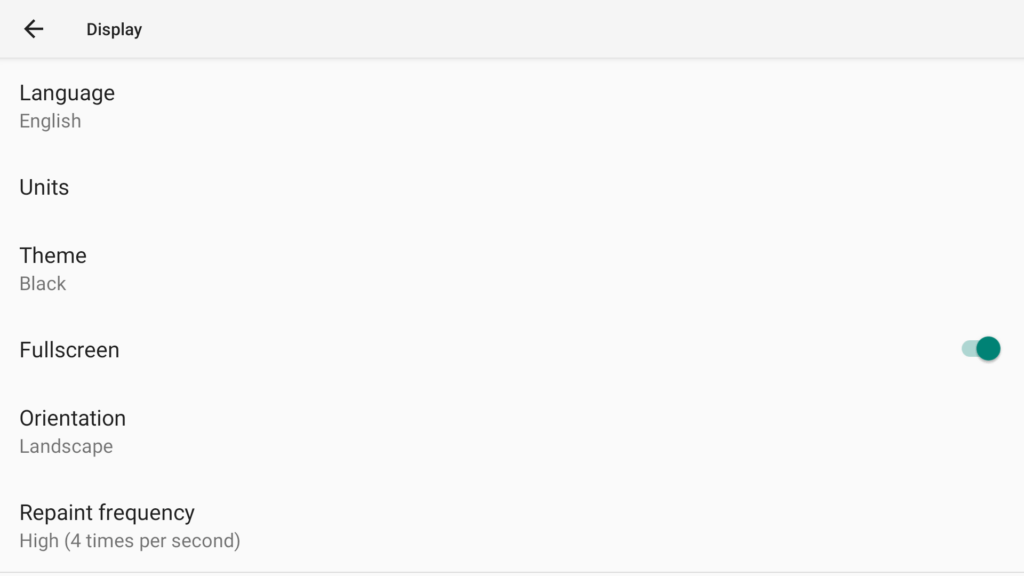
The language should be preset to English, as the AIR3 instructions are written in English and therefore the terms in the app and the instructions are the same. Furthermore, the German translation is not always clear and unambiguous.
The Black theme makes sense for smartphones with AMOLED displays, as it saves energy.
Orientation Landscape is recommended for the map display and for the recumbent harness.

The recommendation is to set the units in the metric system (m, km, km/h, m/s), simply because that is what we are used to. Exceptions are altitude and airspace altitude in feet, as (unfortunately) altitudes in aviation are measured in feet. It is also possible to set altitude and airspace altitude in metres and to set them in feet in the widgets.
For more details, see also the lecture Navigating through airspaces.
Key bindings
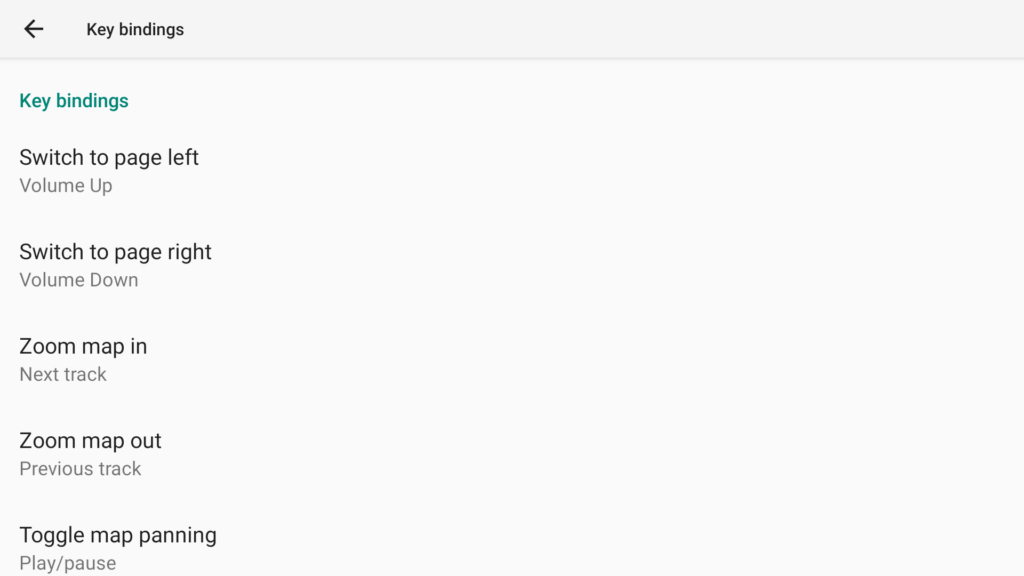
If an external keyboard is used, the key actions can be set here. Smartphone buttons can also be set, but this is rather impractical as they are too small.
I have presented an example of a keyboard that I can recommend in this article.
Widget
In my opinion, the most important widgets are shown here; there are many more, all of which are described in the AIR3 instructions.
Status Line

A useful widget for displaying the status of the smartphone and the connected Vario.
GPS Alt / Baro Alt

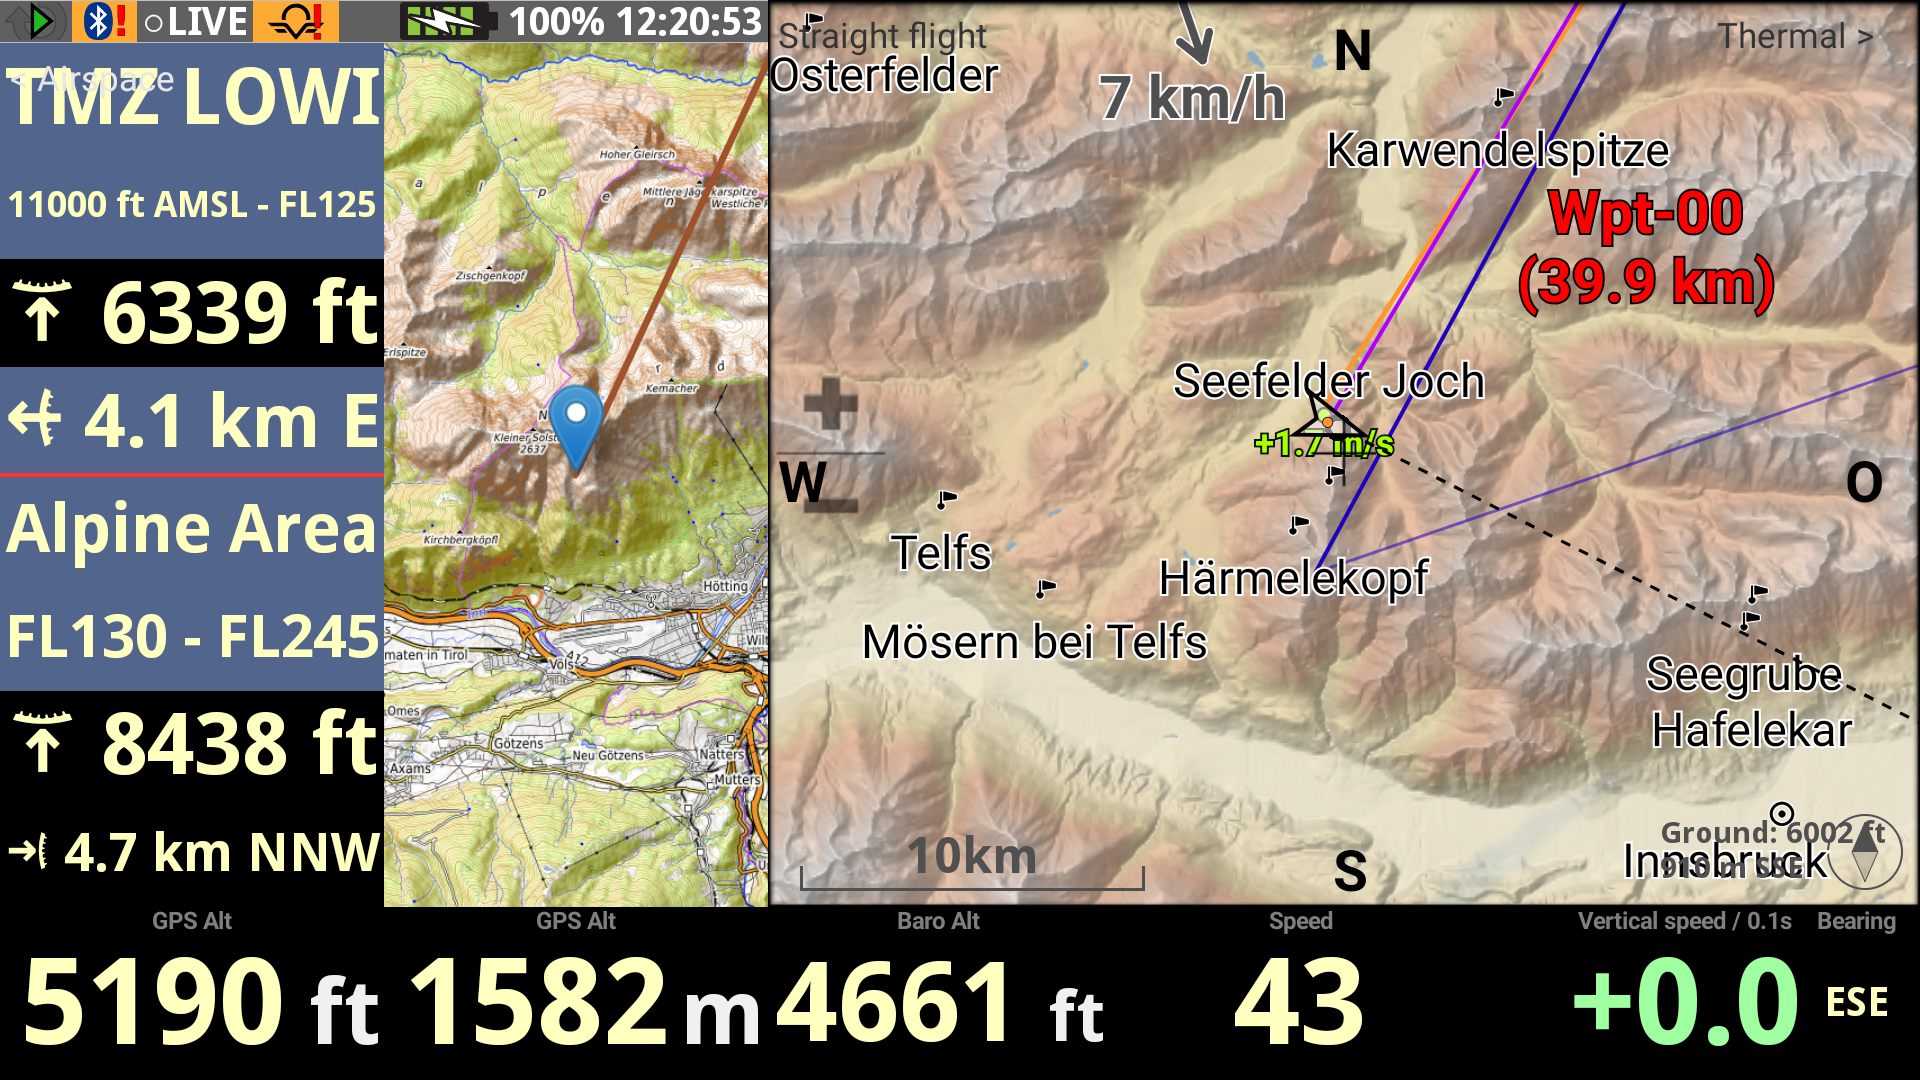
The GPS Alt and Baro Alt widgets display the GPS altitude or the barometric altitude. The altitudes should be displayed in feet, as this is standard practice in aviation and is indicated on the ICAO charts. The GPS altitude ensures that you do not violate any flight level airspace limits (these move upwards in high-pressure areas), and as the airspace limits are checked in the DHV-XC using the GPS altitude, it is advantageous to observe these limits.
The additional height display in metres makes sense, as this is the unit we are used to. Tip: The units can also be stored in the widget title to save space in the width (Pro version only).
Compliance with the QNH airspace limits can be checked using the Baro Alt widget. As the GPS altitude measurement can be inaccurate, I cannot recommend at this point to fly only according to GPS altitude even with QNH airspace limits. But if you do, you can at least be sure that no airspace violation will occur when uploading to DHV-XC later.
Speed

The ground speed (widget speed) is important to determine whether you are flying with a tailwind or headwind. A B glider has a trim speed of approx. 38 km/h. If you fly faster or slower without using the brakes or accelerator, you know whether you are flying with a tailwind or headwind. In the position circles and when the wind direction is unknown, you can determine where the wind is coming from by circling flat. The direction of the circling with the lowest speed is the probable wind direction. To summarise, this means
- Speed > Trim -> Tailwind component
- Speed < trim -> headwind component
In addition, the method can be used to estimate the wind direction and strength displayed in the widgets.
Bearing

If you are caught in a cloud and are already flying in the direction of escape from the cloud, the bearing should be maintained until you have left the cloud. The absolute accuracy of the bearing is not given due to the influence of magnets and metal parts in the harness. Absolute accuracy is less important when leaving clouds if the direction of flight has already been determined.
Airspace proximity

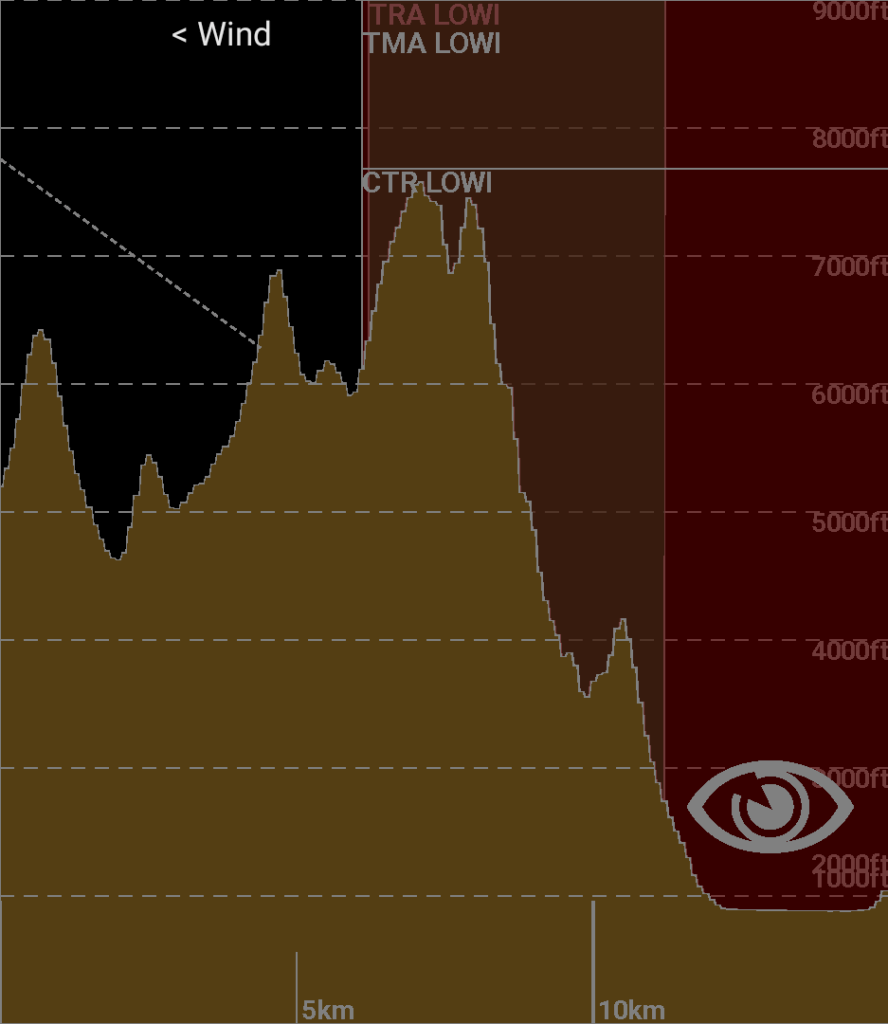
Display of the vertical and horizontal approach to the airspaces.
Colour change indicates an approach:
- Blue close to the airspace, distance greater than 500 m
- Orange on approach to airspace, distance 100 to 500 m
- Red very close to the airspace, distance 0 to 100 m.
If you are within a prohibited airspace (violet), the shortest route to exit is displayed.
Caution: When flying according to GPS altitude, the distance to the airspace may differ, as airspaces are defined according to QNH.
Horizontal airspace warning is already coloured in, although you are still outside vertically.
XC Map
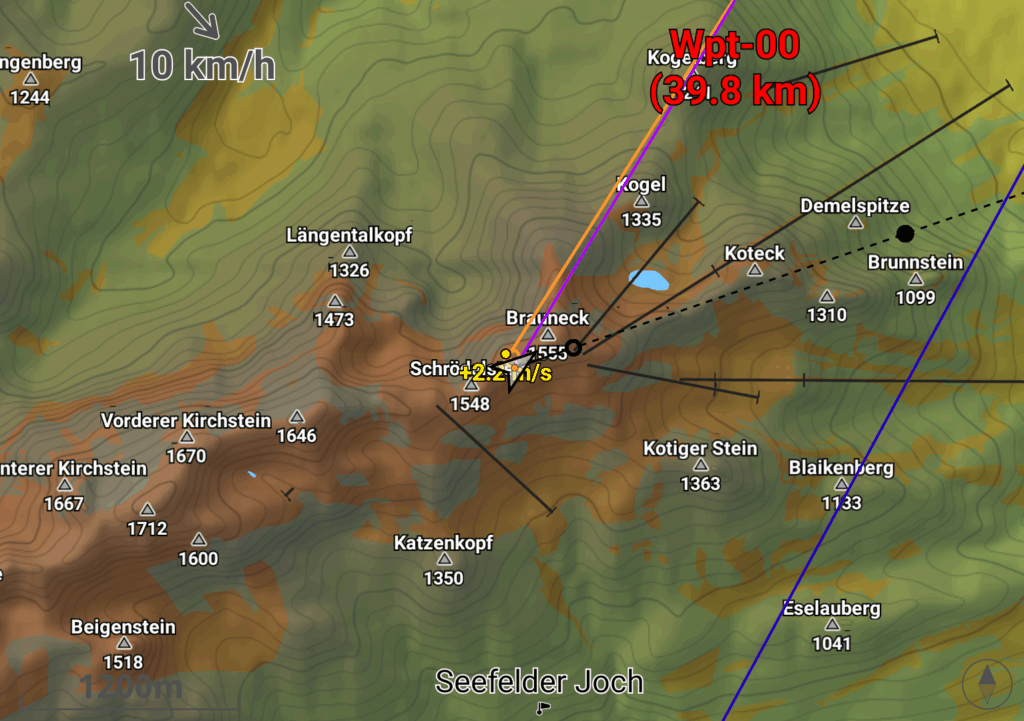
XC Map is a very extensive widget with many parameters. With a multi-layout, only the information that is really important for the respective application should be displayed.
I set North at the top (in contrast to the car sat nav, where the direction of travel is at the top), otherwise the rotating display leads to confusion when circling.
Thermal Assistant
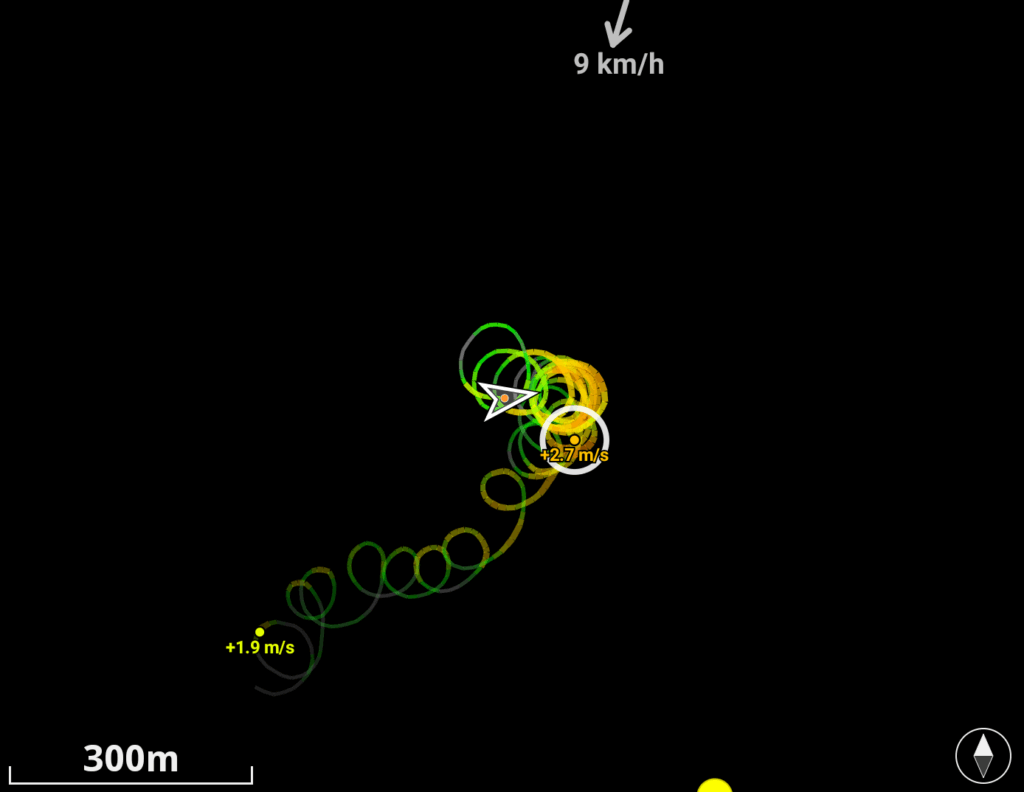
A small scale should be used for re-centring. Colouring shows the thermal strength. The Show wind parameter is useful to take the wind offset into account.
Only when circling does the wind force and direction show meaningful values from the vario, as only in this case can the values be calculated correctly by offsetting the circles.
The thermal assistant can be useful for finding the thermal again if you have fallen out on the windward or leeward side. However, the stronger the wind, the more difficult it is to find the thermal.
Calculate the wind direction and strength using the thermal offset parameter Classic or Particle drift to see which one works best for you.
Please note: If the thermal offset is switched on, the wind strength and direction can no longer be recognised using the thermal circles, as the map is shifted using the calculated wind. If the real wind is weaker than the calculated wind, this can lead to the map being shifted further than corresponds to the real offset.
