
In the article Checking paraglider trim, I already mentioned how important it is to regularly check the trim of your paraglider. At that time, the trim was checked with the help of a commercial provider, but for some time now it has been possible to carry out the check via the we-measure website. In this article, I would like to explain in more detail how this works and what you need to bear in mind.
The glider I want to check the trim of is the Advance Iota DSL. It is now just under a year old and has flown a good 60 hours and so far has not been involved in any nasty things like violent spiral dives or safety courses.
I will not go into all the functions of we-measure below, a very comprehensive help and FAQ is available on the we-measure website under Help and FAQ.
Vision
The team behind we-measure, Benjamin Lutze and Nora Martiny, describe their vision as follows:
“In the world of paragliding, the meticulous task of line measurement and trimming is crucial for flight safety and optimal performance. Recognizing this critical need, we-measure.io emerges as a service, dedicated to transforming the way paraglider pilots verify their wing’s trim.
Our software simplifies the complex task of measuring and evaluating line lengths, providing pilots with an intuitive and accessible tool.
We are mindful of the essential role professional paraglider check centers play. Hence, we-measure.io is not a replacement but a complementary tool, designed to empower pilots with additional resources for their equipment’s upkeep.
For the future we envision a community-driven platform where users can contribute in creating a collaborative and verified database. This will foster a shared sense of responsibility and expertise, embodying the spirit of “WE” in we-measure.io. Our dedication is about nurturing a community and a culture of collective effort and shared knowledge.
Developed in our sparetime using open-source software like Enhavo, Symfony, Node.js, PHP and many more, we embrace the ethos of free software. However, continuous development and maintenance require significant effort.
If you find our application useful, consider expressing your gratitude through a PayPal contribution.
https://www.paypal.com/paypalme/lbutze”
Trim basics
I don’t want to go into detail on the subject of trim at this point; basic information on the subject of trim can be found in the following sources, among others (all in german):
- Podz-Glidz #32: Trim tuning
- THERMIK 2020 – Ralf Antz – paraglider trim
- Trim issue slowly seeps into the paragliding world
Preparation
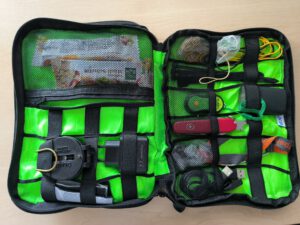
The laser measuring device must be supported. The Leica company is recommended; I decided in favour of the simplest and cheapest model, the Leica DISTO D1. We-measure offers the possibility to test the laser measuring device that may already be available for support by we-measure.
After registering on we-measure, the desired wing must be created under Wings. Not all wings on the market will be displayed, either because the wing has not yet been created or because some manufacturers prohibit a listing at this point. In this case, please contact we-measure, who will add your wing to your profile if the line data is available.
Structure
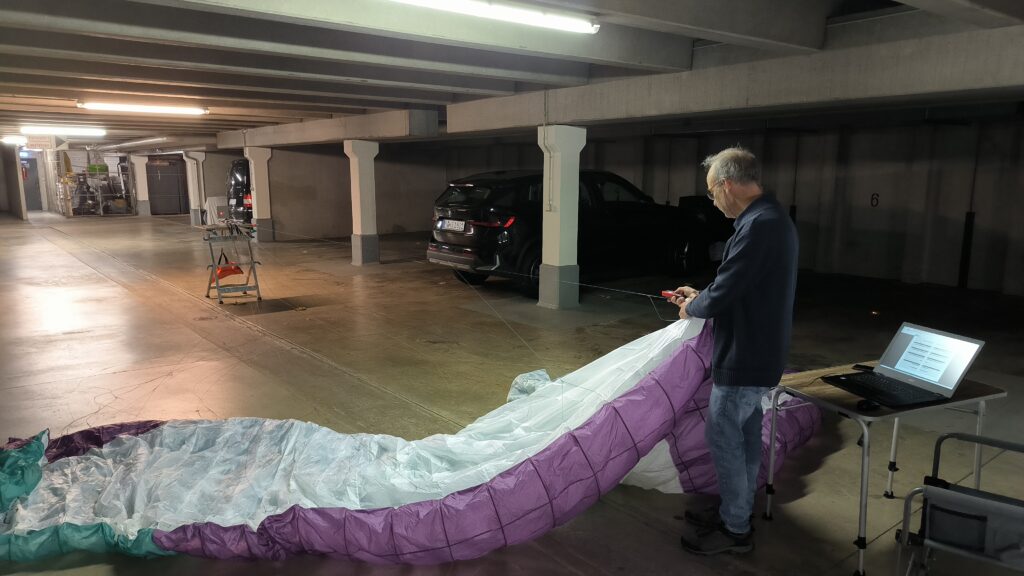
The self-made tensioning device, the construction of which I have explained in this article, must be attached to a table as shown in the photo. A 5 kg weight (equivalent to approximately 50 Newtons) must be attached to this tensioning device to ensure that the required tension of the suspension lines is guaranteed and the measurement is reproducible. The risers must be attached and aligned at the front. Unlike what I did, it would probably have been better to set up the table lengthways so that the risers rest completely on the table. In the orientation I chose, it often happened that the risers got caught on the table.
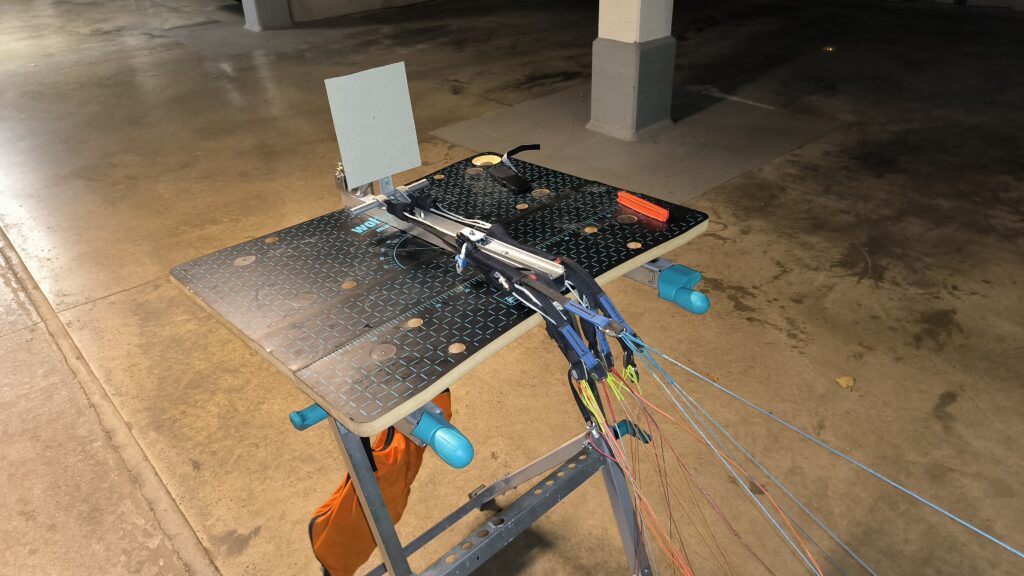
As you can see in the photo below, it is advantageous to have a dry, well-lit and sufficiently large room (so that the paraglider can be spread out completely). The laptop should be placed directly next to the person taking the measurements. As the data is transferred directly to we-measure.io, the laptop naturally requires an internet connection.
Measurement
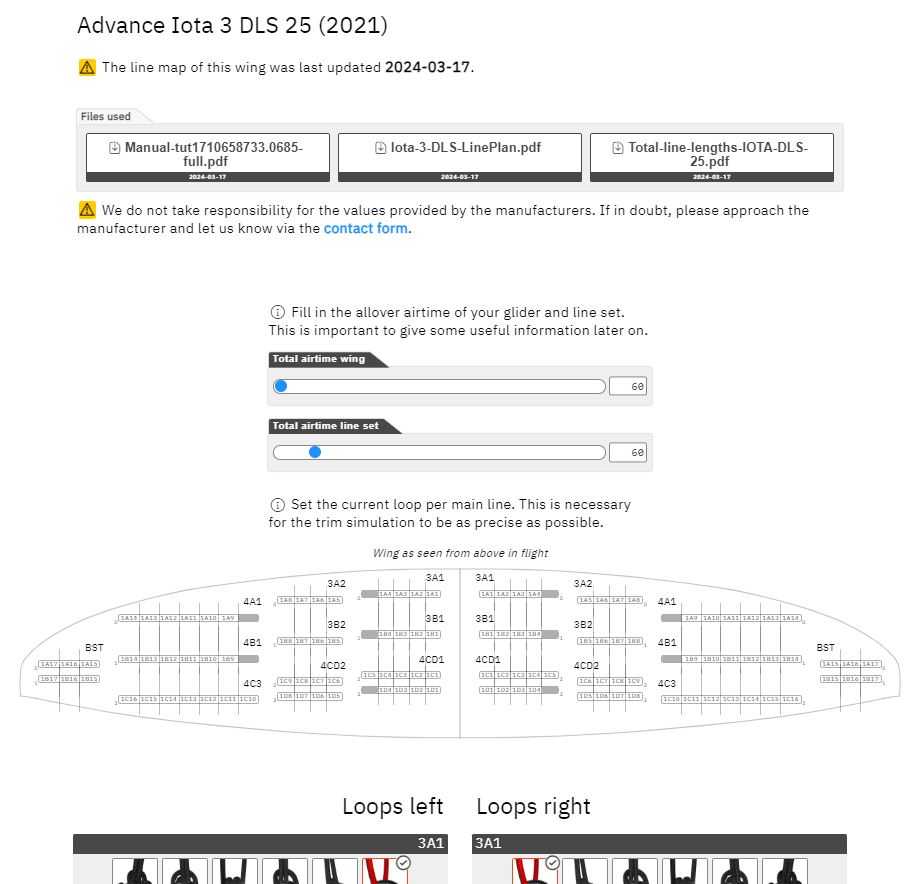
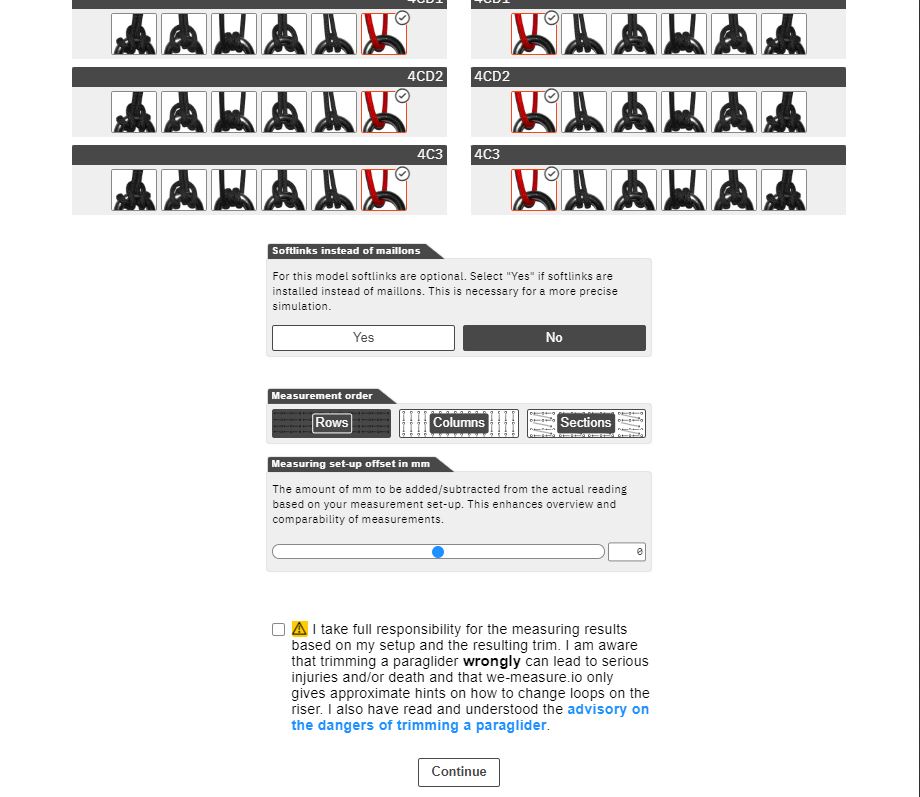
The measurement starts by clicking on Measure and selecting the desired glider. The line plan, line lengths and instructions for the glider can then be downloaded. The airtime of the glider and the lines can also be entered separately. The line loops in the maillons can be selected graphically. Depending on the tensioning device, an offset can also be specified, as the target disc and risers are at the same height in my device, the offset is zero.
On the next page, the laser measurement device is paired and connected by clicking Connect to Laser. Click on Measure to start the actual measurement. The first line should now be displayed in a small window.
In my case, this is the 3A1 1A1 line. Hook the slot of the laser measuring device into the attachment of the line, pull the line about 10 to 20 cm and align the laser measuring device with the target. The laser is switched on with the first click on ON and the measurement is transferred to the website with the second click. It is advantageous to turn the slot of the laser measuring device by 90° so that the line can be pulled more easily and the screen fabric does not slip into the slot. It is helpful to pull the paraglider with the second hand to support the hand on the measuring device, otherwise it is almost impossible to align the laser beam with the target, the 5 kg pulls too much.
The very good graphical representation of the line diagram makes it relatively easy to find the right line. This should make it easy to find the right line, even for those who are measuring for the first time.
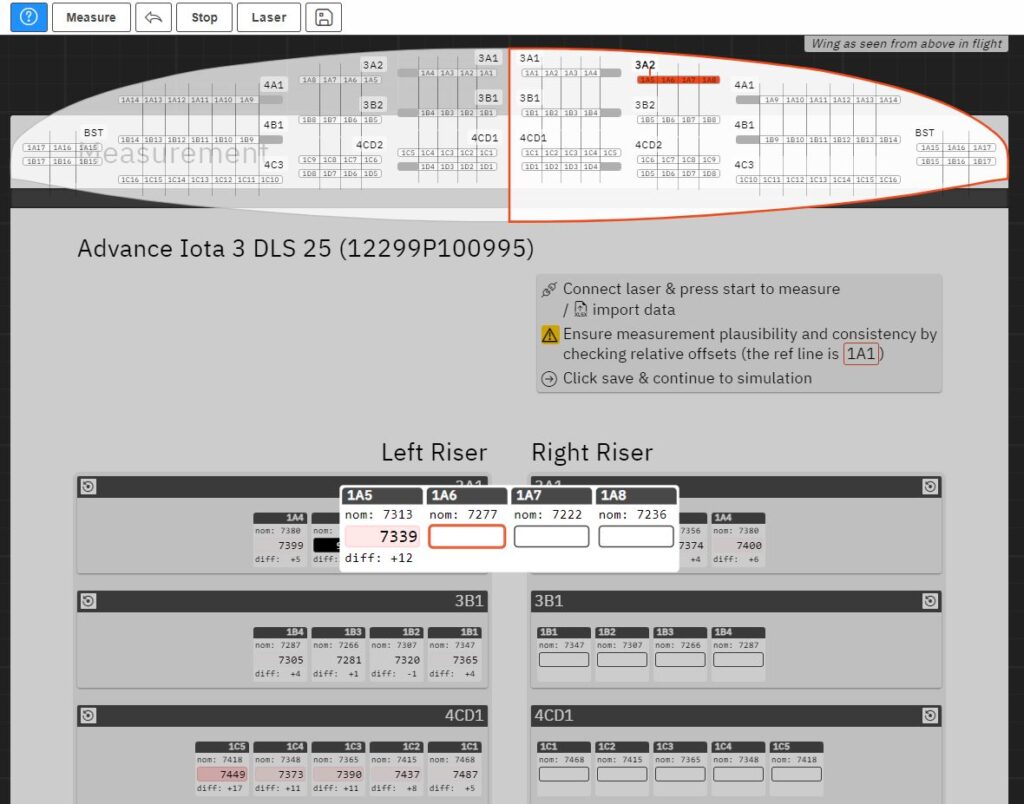
The first measurement is used as a reference, i.e. the difference for all subsequent measurements refers to the first measurement. The background to this is that a warning tone is emitted during the plausibility check if certain limits are exceeded. The measurement is displayed in black. After clicking the Backward button, the measurement can be repeated.
Simulation
Clicking on the Forward button takes you to the simulation page. Here you can test the effects on the trim when changing the loops on the line locks. I have not tested the simulation any further, as any unauthorised changes to the trim are out of the question for me. I prefer to leave that to an expert paragliding workshop.
But it’s definitely good for playing around, the trim is displayed as a red line in the canopy profile.
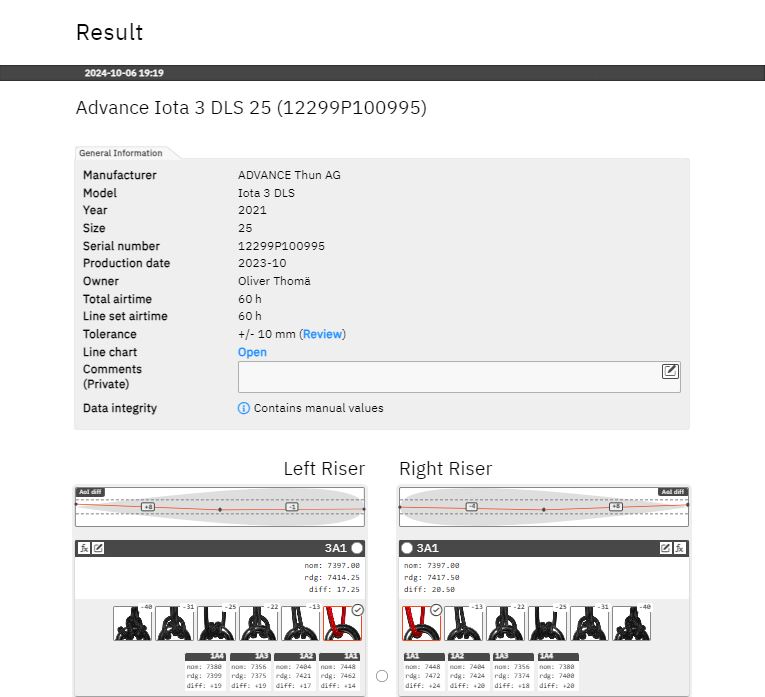
Trimcheck results
Once the measurement is complete, the results can be analysed. Click on Create a measurement report as PDF or Export your measurement values to XLSX to save the results in files.
Conclusion
We-measure offers very good support for checking the trim of your own paraglider. The range of functions is very comprehensive, so that you are almost overwhelmed by the many functions during the first measurement. Nevertheless, I would say that the interested pilot can learn a lot by checking the trim, especially as the trim has a safety aspect. Even if you don’t want to change the trim yourself, as most pilots probably do, it is worthwhile for pilots to take measurements, even over the years, in order to have a good feeling when flying, at least as far as the trim is concerned. Unfortunately, the site is only available in English.
The most expensive part of the measuring set-up was the laser measuring device, the simplest model from Leica, the DISTO D1, cost €105.00, the self-made clamping device about €40.00. In my opinion, this is definitely a worthwhile investment. A donation to we-measure, who have put a lot of effort and heart and soul into creating the website, should be worth it.

Pingback: Tensioning device for the trim check - Ad Nubes | Paragliding blog