
Two years ago, I explained my XC Track page layouts in more detail. XC Track has evolved and I have also gained new insights since then. I have therefore adapted the settings over time and would like to present my updated settings again here.
Some of the functions I use are only available in the Pro version. But a great app like XC Track definitely deserves financial support. My XC Track configuration can be downloaded here:
The file must be extracted after the download.
Note 1: In the following, I will only explain the widgets to the extent necessary to understand the concept. A more detailed description of the widgets can be found on the AIR3 website. The headings below are therefore also in English.
Note 2: All texts that can be found in the app are shown in italics below.
Note 3: As I took the screenshots at home using the Tracklog Replay function, the positions on the Internet pages (e.g. at Thermik Pumpt) do not match those on the XC Track charts.
Preferences
Only certain settings are mentioned below. All other settings are explained in detail in the above-mentioned XC Track Manual from AIR3.
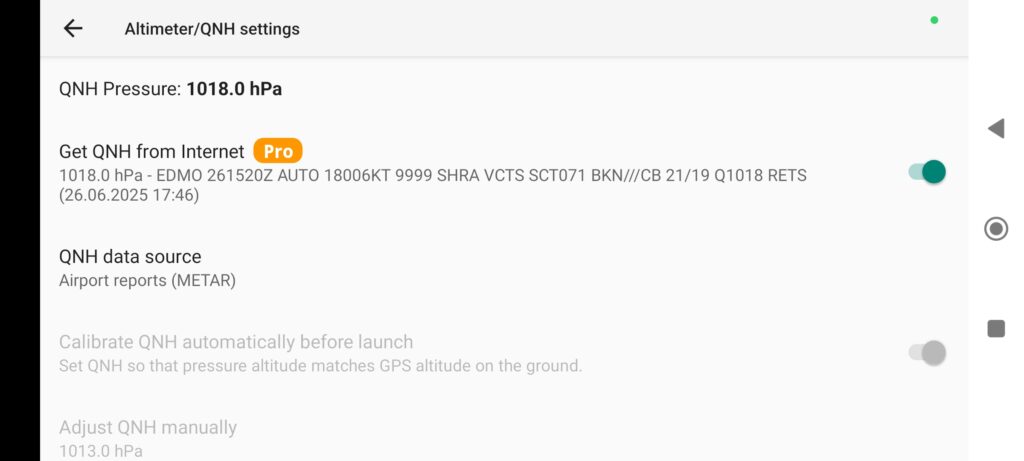
Altimeter/QNH settings
In order for the Baro Alt widget to display the correct QNH altitude (see page layout 1 below), Get QNH from Internet should be activated. QNH data source is set to Airport reports (METAR). In areas with few aerodromes, Weather Stations may be the better choice.
Airspaces and obstacles
In the Web tab, you should check whether the country in which you wish to fly is activated.
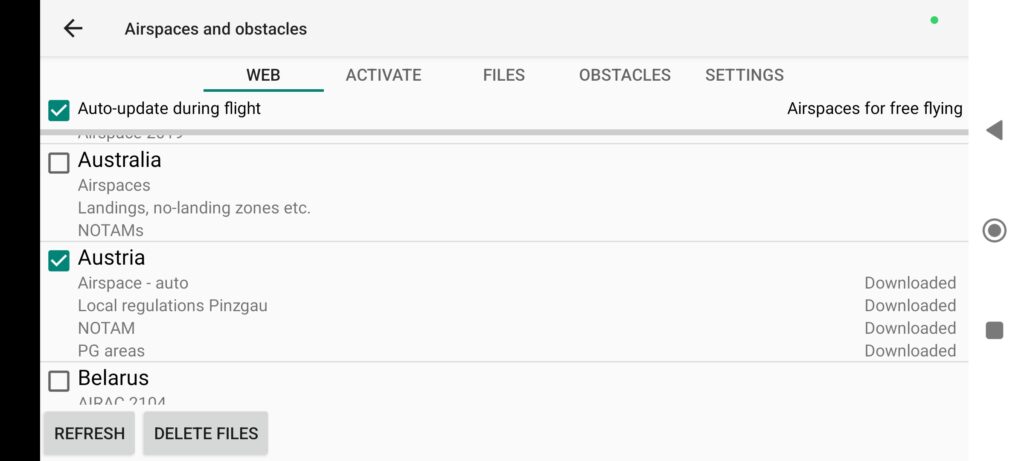
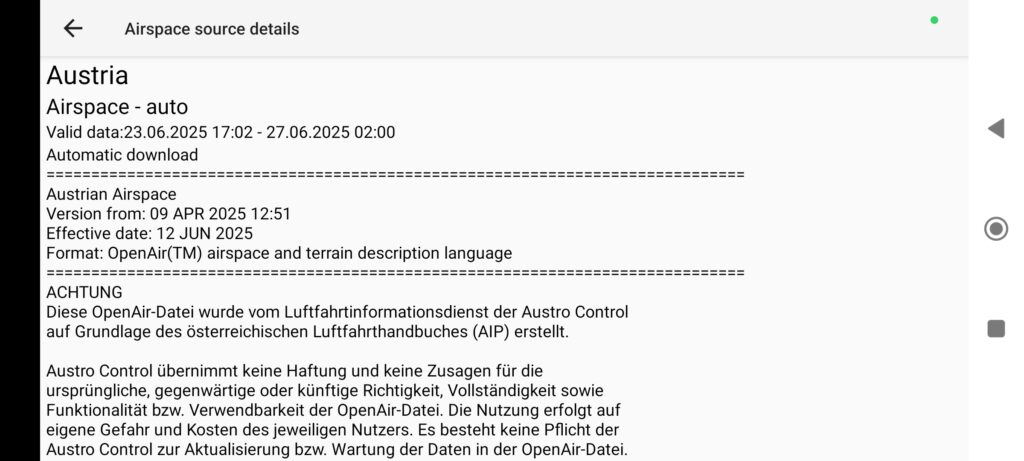
By clicking on a country, you can and should check that the data is up-to-date before each flight. But beware, the data does not come from an official source, but from XContest. There is therefore no guarantee that the information is correct and up-to-date.
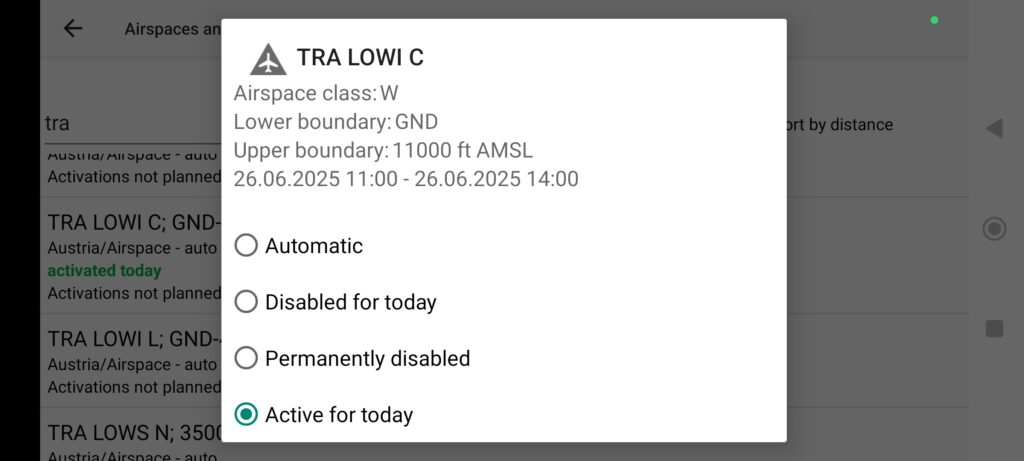
As Georg recommended in his presentation, all TRAs that are active according to the respective air traffic control system should be activated before the flight. Otherwise, an airspace violation warning tone will sound during the flight.
Display
It is advisable to set the language of the app to English, as the German translations are sometimes misleading. It is also easier to find the terms in the above-mentioned AIR3 instructions in the app.
As altitude is usually specified in feet in aviation, I have set the Altitude and Airspace Alittude to ft (to be found under Units). All other units are set to the metric system, as is usual outside the USA.
Pages layout
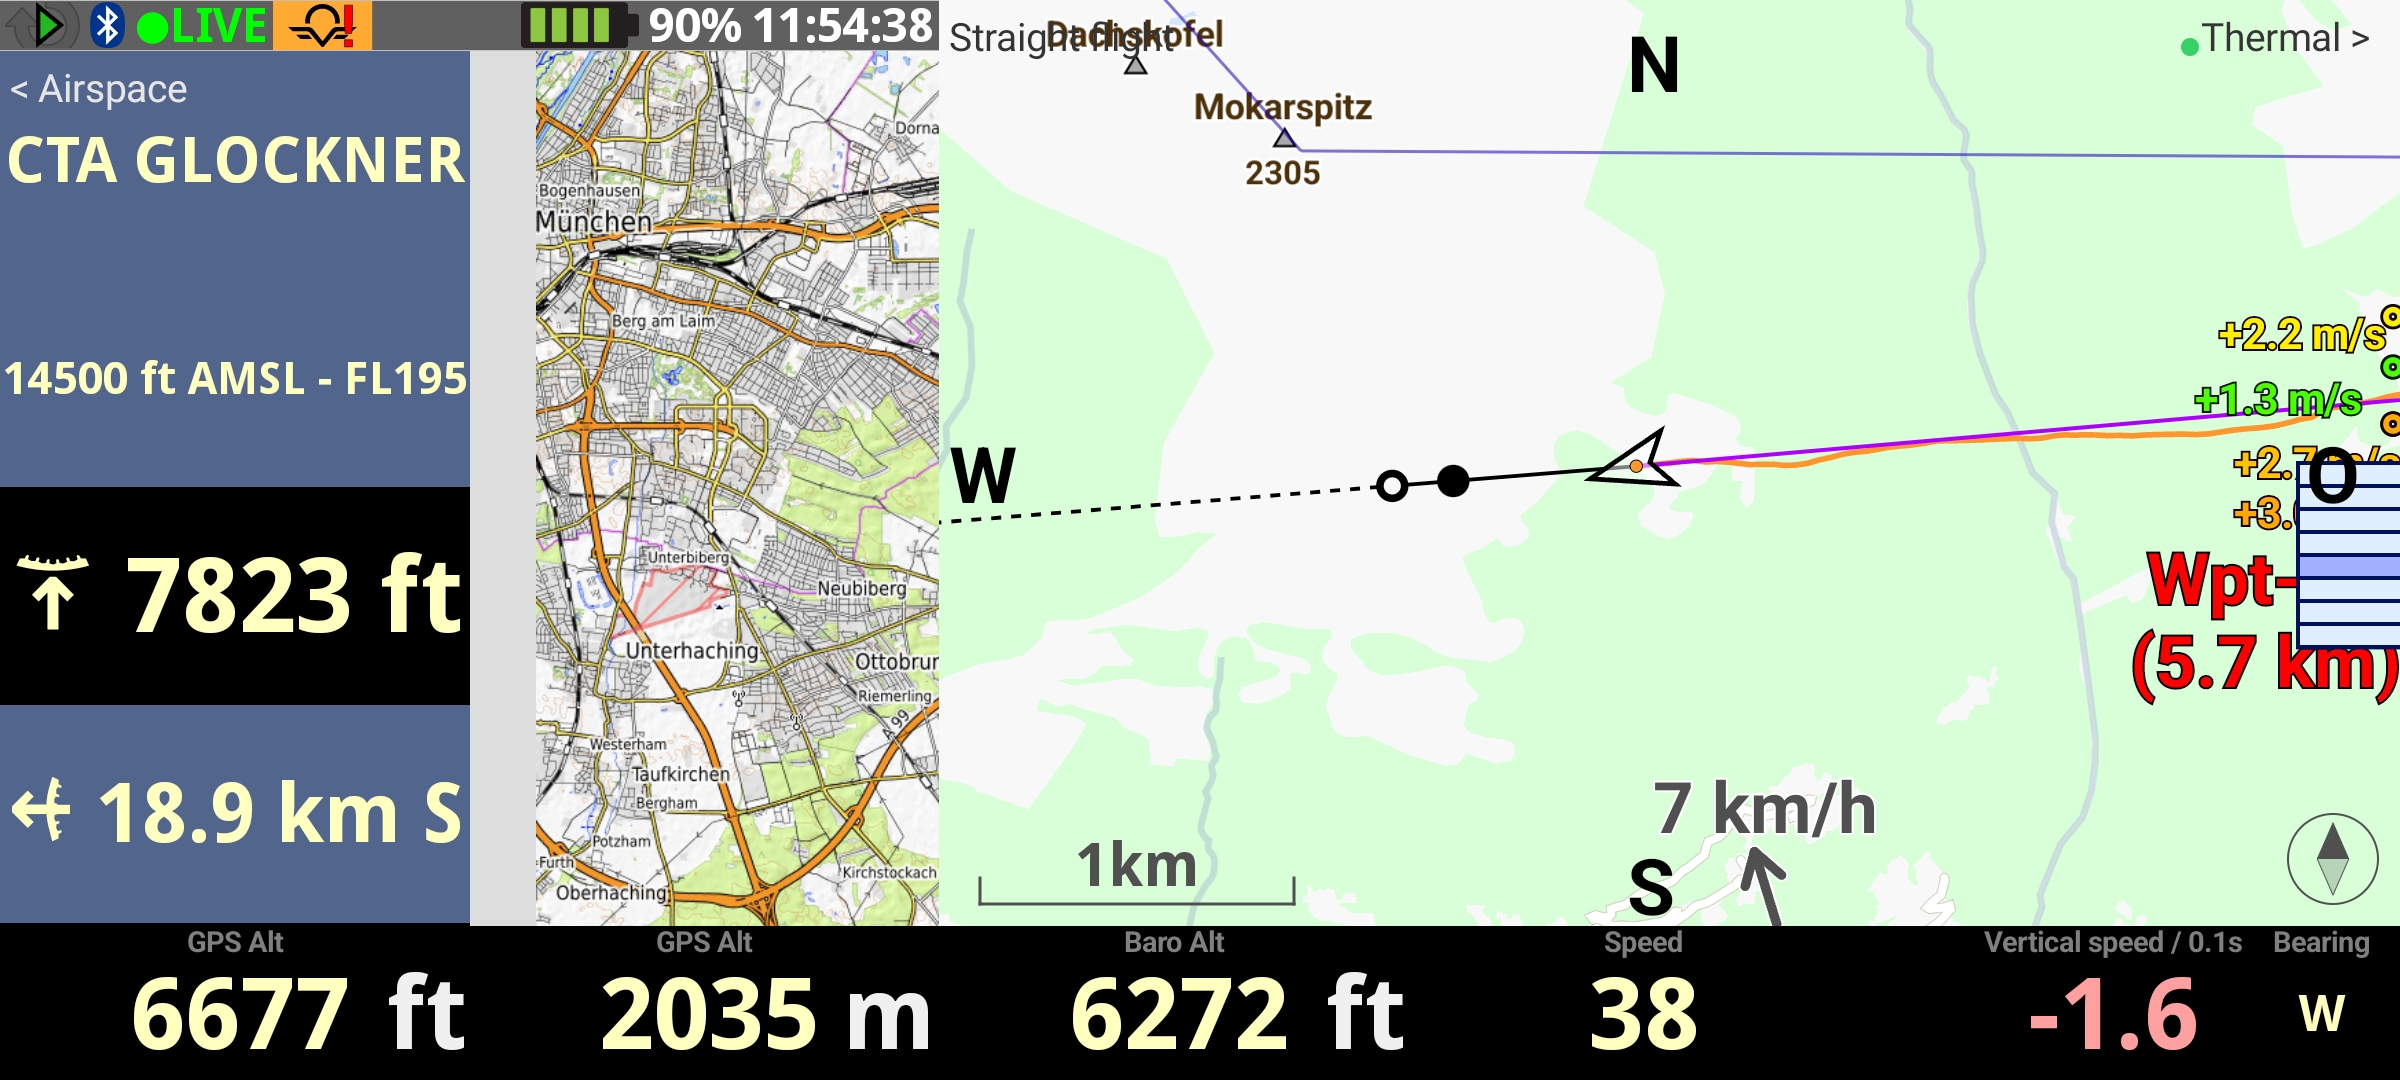
In order to recognise at a glance which layout I am on, each layout is named with a memorable text in the top centre. These are Straight, Thermal, Task, Wind and Airspace. Switching between the layouts is done via a keyboard. So that I know which layout is on the right or left side of the current layout, the layouts are labelled at the top left or right, for example on the Straight layout top left < Airspace or right Thermal >.
Switching between the Straight and Thermal layouts takes place automatically as soon as you enter or leave a thermal (settings can be found under Preferences – Automatic actions).
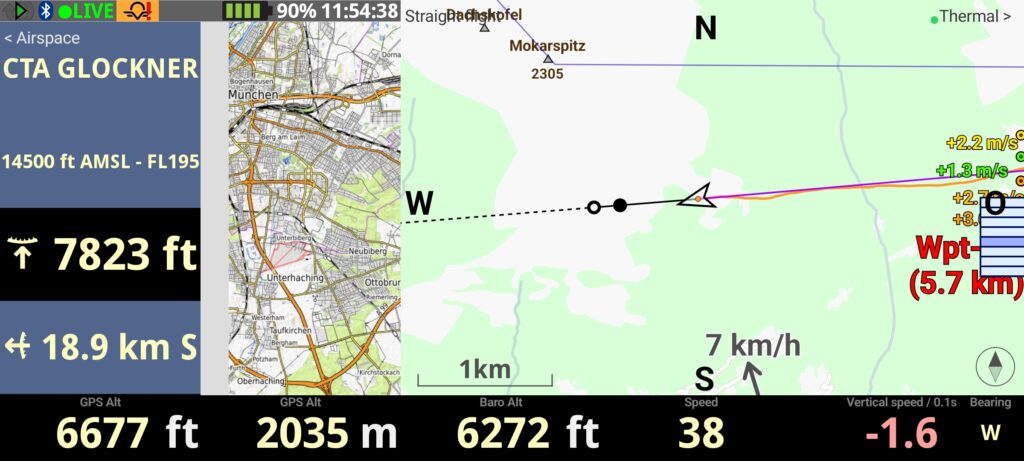
Page layout 1
The Straight page layout is displayed in straight flight.
The airspace proximity widget is displayed on the left-hand side. The vertical distances to the airspaces are shown in feet, as is usual in aviation, and the horizontal distances in kilometres. The symbols of the airspace proximity widget are not very intuitive and should be well memorised in advance.
The Thermik Pumpt website is displayed in the centre. According to the developer, it should offer real added value when flying in the mountains to find the next thermal. I use the zoom factor of 11 recommended by the developer and occasionally use Thermik Pumpt to find the nearest thermal.
As the XC map is displayed on the right-hand side during straight flight, Display waypoints, Display cities and Show bearing (course) line are activated to display the planned route and waypoints. Mark glide distance is also activated to estimate whether it is realistic to reach the mountains on the other side after crossing the valley.
For information purposes, I have activated Display nearby pilots and Display tracklogs of selected pilots, as I sometimes follow pilots who are better cross-country pilots than I am. To follow the tracks of other pilots, the pilots must be activated under Livetracking – Flights.
There are many other settings XC map widgets, but I can’t list them all. However, you should only show the really important information, otherwise it will quickly become confusing.
With the Free text widget, all points of the compass are also stored for better orientation in the air.
The current GPS altitude in feet is displayed at the bottom left to ensure that the distance to flight level airspaces is maintained. For background information, see Georg’s presentation. In addition, the GPS altitude in metres, as you are simply used to metric units. The Baro Alt widget is set to QNH in order to safely maintain the distance to airspaces in feet.
The bearing is shown at the bottom right, so if I do get sucked into a cloud, it could be useful to leave it again in a straight line. Some pilots have a compass installed on the cockpit for this purpose, but the bearing is distorted by various external influences.
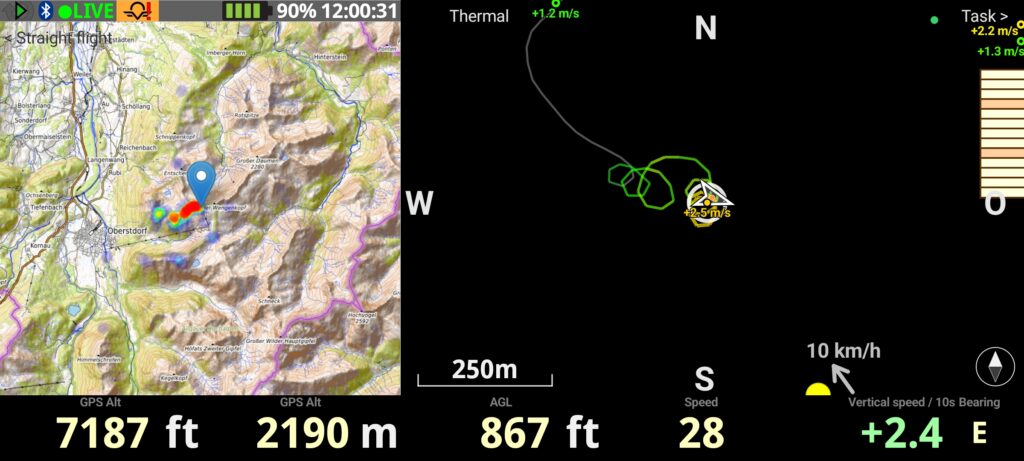
Page layout 2
The system automatically switches to the Thermal page layout as soon as I turn in the thermal.
The thermal pumping website is also displayed here to estimate whether the next thermal is within reach when cranking in the current thermal.
The thermal assistant is displayed in the centre. I have set the parameter How to include wind into computation: to Classic. In stronger winds and in the mountains, this only helps to a limited extent. Sometimes it helps me to find the lost thermal again, sometimes not. I also have the wind arrow displayed, but my experience there is rather mixed. I often get the impression that the wind force and direction displayed are not correct. I have the impression that both the wind indicator and the thermal indicator work better in the lowlands.
At the bottom right, I display the vertical speed averaged over 10 seconds to be able to better estimate whether I have centred the thermal well.
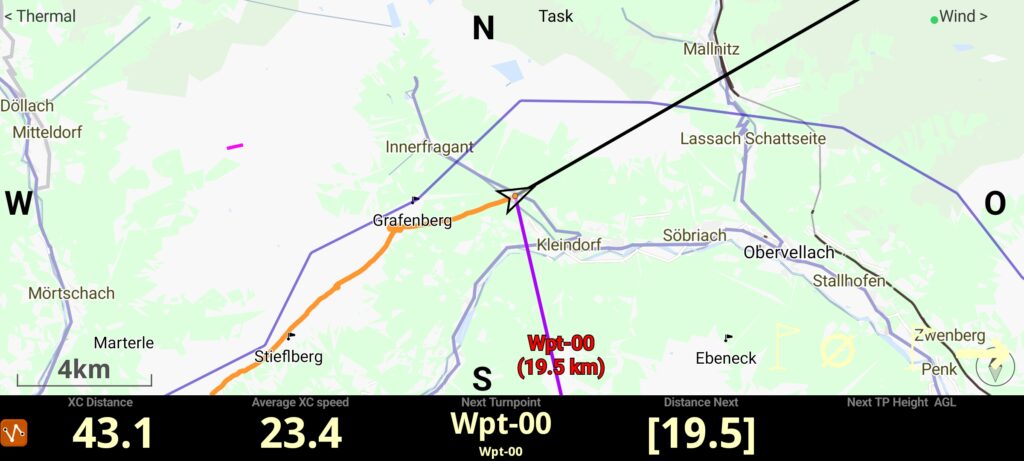
Page layout 3
The task map is intended to give me an overview of the waypoints flown so far and the waypoints that are still planned. For this reason, the display waypoints, Draw a navigation line, which are used for navigation, are shown on a larger map scale. Navigation buttons forwards and backwards are shown on the right.
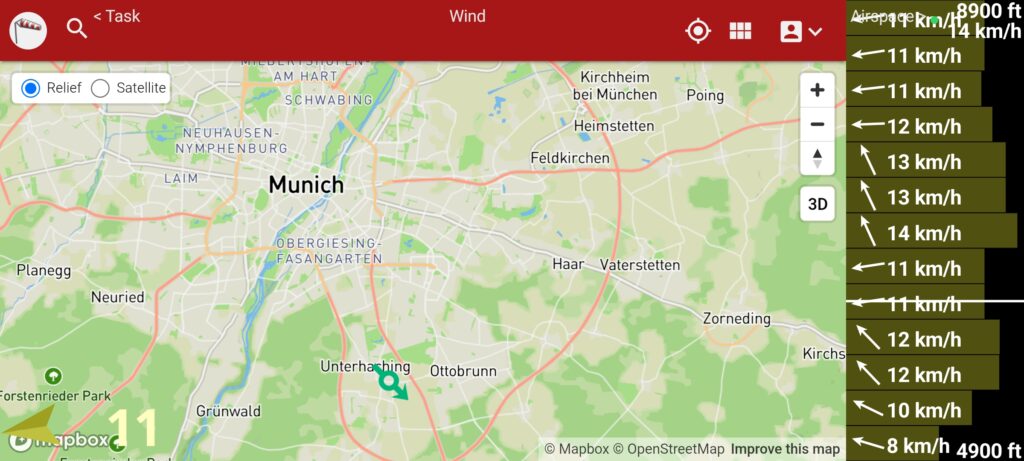
Page layout 4
Wind is probably one of the most important factors that should be taken into account for safe flying. On the Wind layout, the winds.mobi website is displayed on the left-hand side to show all available wind indicators in the vicinity that are recorded with winds.mobi.
Especially in the mountains, it is important to know what the wind speeds are at different altitudes. This can be done with the Altitude statistics widgets. The wind force and direction determined during the flight are displayed.
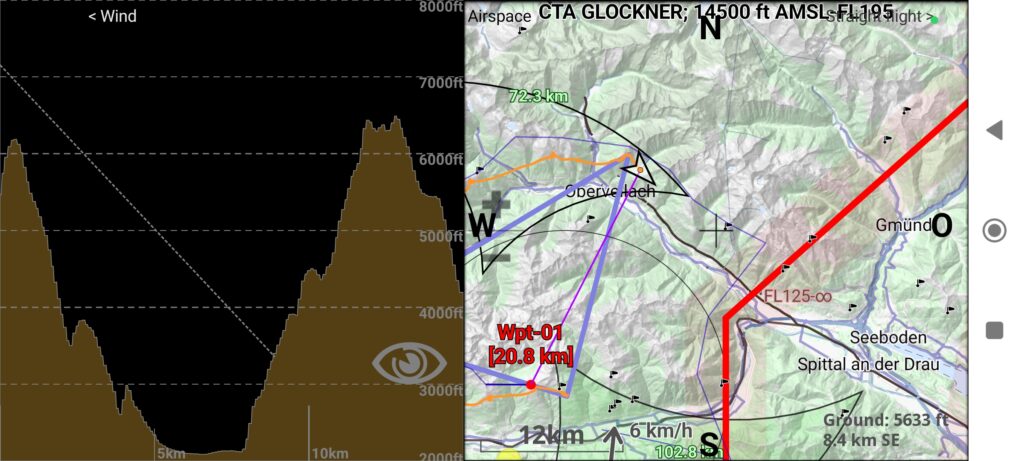
Page layout 5
The Airspace layout shows the airspaces in side view and landscape view. Georg has explained very well in his article why you should do it this way.


Hi Oliver,
I would suggest an improvement to all the web widgets which embed an external map: you can overlay a transparent XC map widget on top, which will enable you to locate your track directly on the map. I found out that for some zoom levels, everything lines up perfectly. For example the zoom level 11 recommended by the developer of Thermik Pumpt corresponds exactly to a scale of 6km in XC track.
Ideally I would like to bind the scale of the overlay to the zoom level passed in the url. I raised a ticket on https://gitlab.com/xcontest-public/xctrack-public/-/issues/1235#note_2611906889 to ask exactly for this. Feel free to give it a thumbs up!
Thank you for the inspiration and hello from France 🙂
Christophe-Marie Duquesne
Hi Christophe,
a good idea, you got my thumb up at gitlab.
Oliver
Danke for the page configs, was really struggling getting a decent layout in XC Track. Deleted a few of the Pro widgets and re-arranged for my free version 🙂
Jon