
It has been known and discussed for a long time that a trimmed glider at best simply starts badly, but in the worst case it can even be life-threatening. But how can I check the trim of my glider myself?
Herbert, a club colleague from the Bodenlosen e.V. in Munich, kindly agreed to explain in detail to me and 4 other pilots during the rescue throw training the measurement of the line lengths necessary for checking the correct trim, so that we were able to carry out the measurement ourselves. The paraglider line measuring device (scroll down for English) from ParaFly24 was used.
The measurement was carried out by and with the help of Herbert and I would like to thank him again at this point, the line measuring device was provided by the Bodenlosen e.V., again my thanks.
My glider, whose trim I would like to check, is an Ozone Alpina 4 ML. It is now just under 2 years old, has flown a good 100 hours and has not been through any messes such as a violent spiral dive or safety course.
Basics
I do not want to dwell on the subject of trim here, basic information on the subject of trim can be found in the following sources, among others:
- Podz-Glidz #32: Trimmtuning
- THERMIK 2020 – Ralf Antz – paraglider trim
- Trim Thematik sickert langsam in die Gleitschirmwelt
All information in German, but I guess you will find some information in English too.
Preparation
On the Ozone homepage the line diagram and the nominal values of the line length of my Alpina 4 size ML are available for download, see the next two pictures. The information is indispensable for checking the trim, if it is not available on the manufacturers’ homepage, it must be requested beforehand.
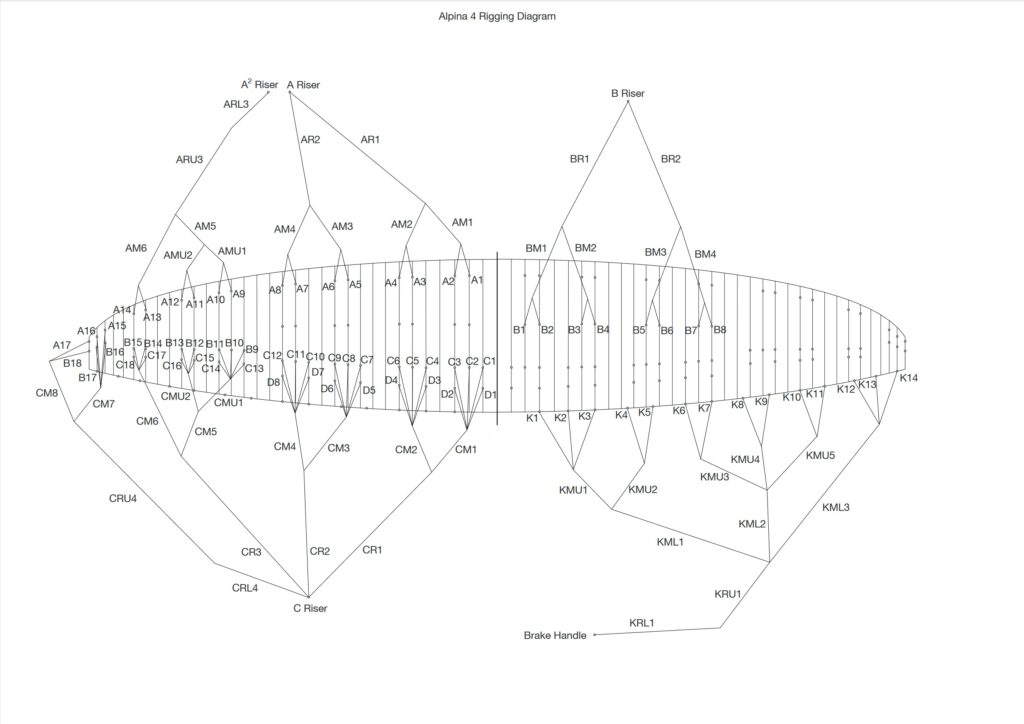
For example, the line A1 of my Alpina A4 ML has a nominal value of 7463 mm from the loop on the lower sail to the loop on the riser.
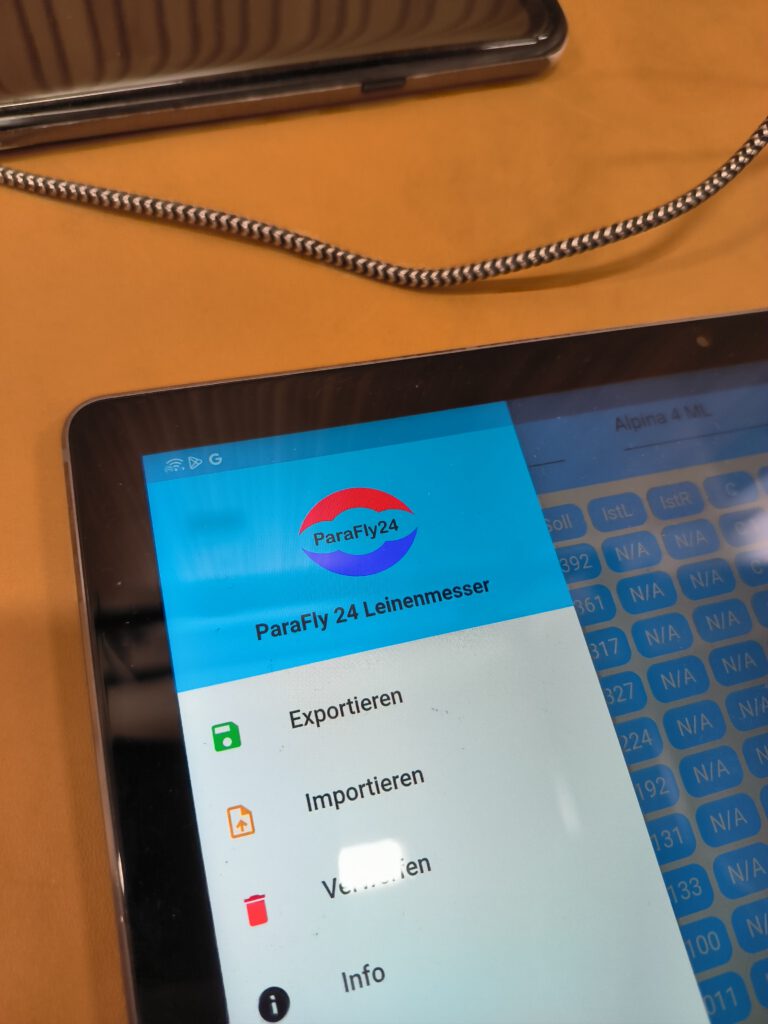
In order for the line length data to be imported into the ParaFly 24 App, it must be in CSV format (Comma Separated Values). Ozone provides the data as an Excel file, so conversion to CSV format is possible. The ParaFly 24 App is only available for the Android operating system and only after prior registration with ParaFly 24.
The laser rangefinder (Bosch PLR 30 C) is to be connected to the tablet via Bluetooth.
Layout
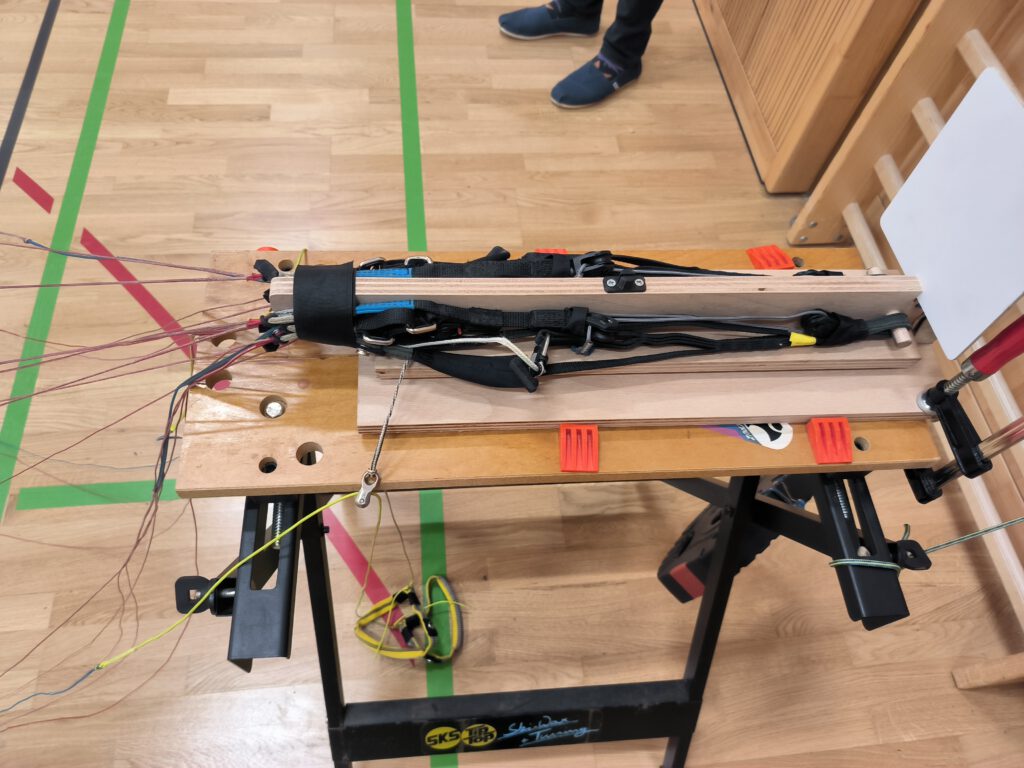
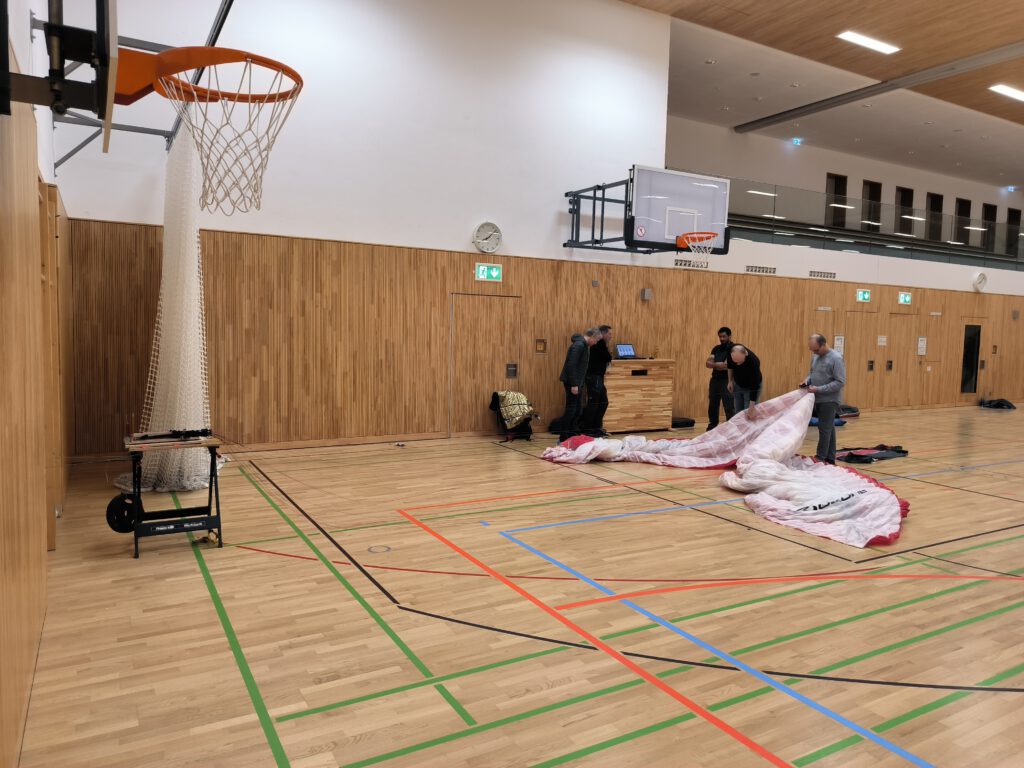
The measuring apparatus must be attached to a table, as shown in the photo. A 5 kg weight must be attached to this apparatus. The risers must be hooked in and fastened at the front with a Velcro strap. More details on the assembly can be found in the instructions.
The paraglider is to be laid out for measurement as shown in the photo below.
Measurement
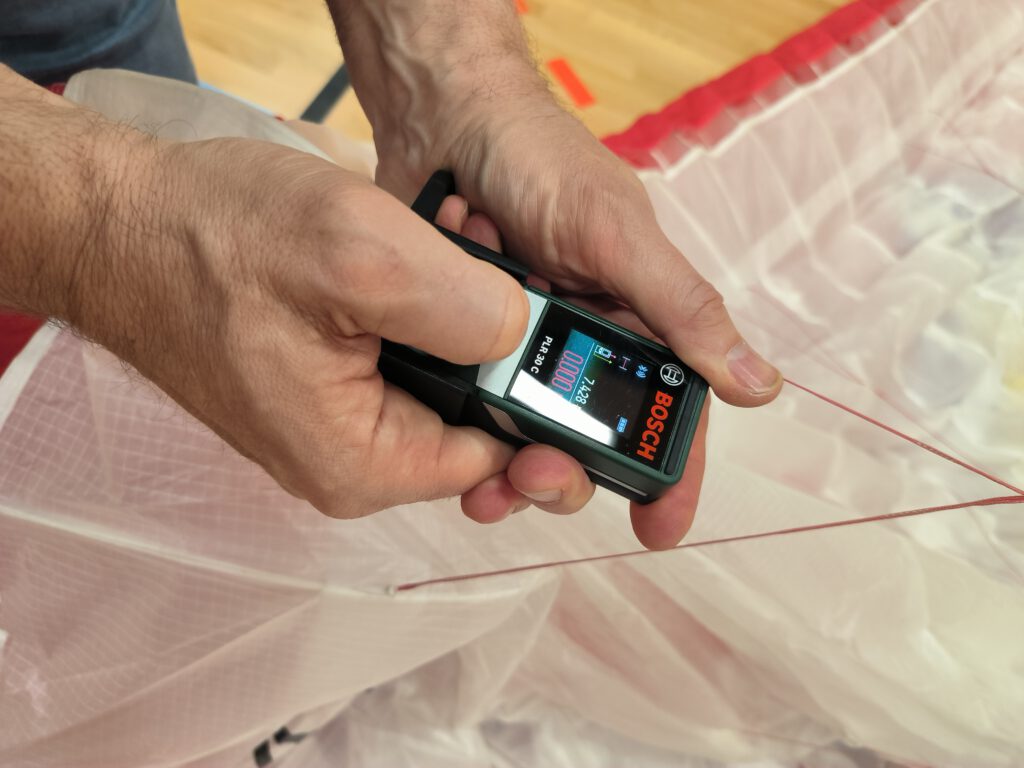
Now the tedious part of the measurement begins, the laser rangefinder has to be hooked into the line on the lower sail, the line has to be brought to tension and then the laser pointer has to be aligned with the white shield of the measuring device. One click on the “arrow up” button switches the laser pointer on, the second click starts the measurement and automatically transfers the measurement result to the app via Bluetooth.
Pulling and aligning the laser rangefinder at the same time needs to be practised. The white shield is too small in my opinion, I had a few incorrect measurements. You should always check the measurement for plausibility, because you can only ever delete and repeat the last measurements. It is not possible to select, delete and repeat any measurement. Furthermore, it is recommended to take the measurement with two hands, as shown in the photo below.
Herbert warned me not to touch the Bluetooth button of the laser rangefinder, if this interrupts the measurement series, it must be repeated completely.
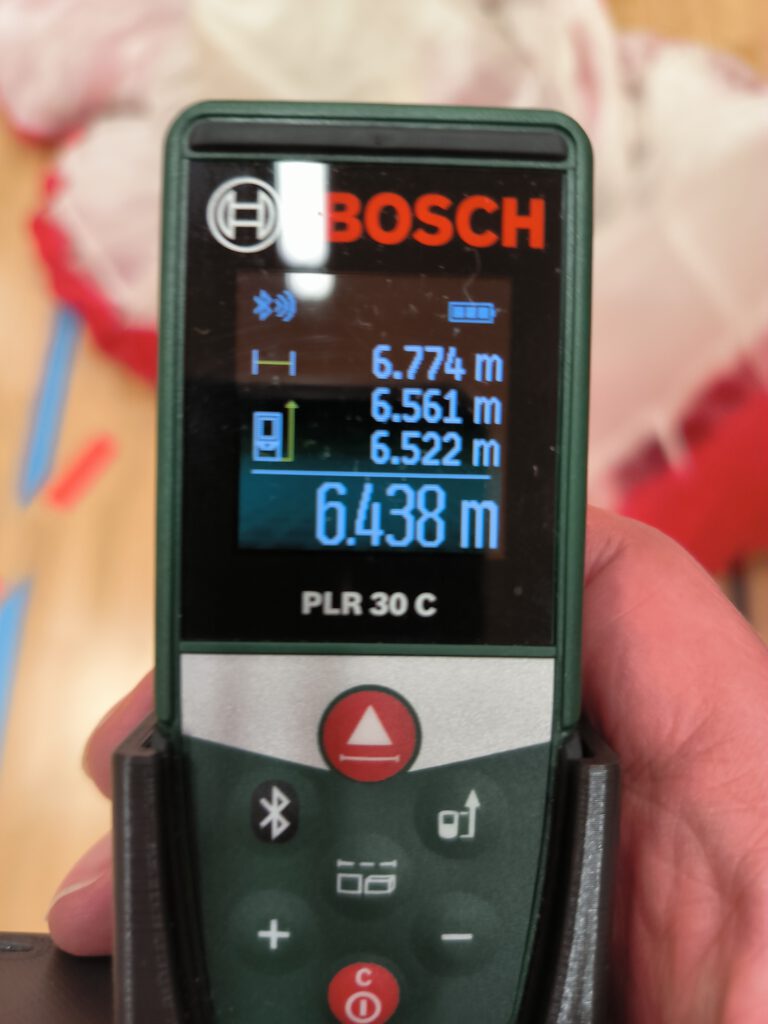
The lines must be measured in the order given in the table. Each successful measurement is shown in colour and acknowledged with a beep (the photo below is the measurement of another pilot).

Finding the right lines, especially for levels B to D, is not as easy as it may seem, as the gallery lines can be split on different levels. For example, the lines C1, C2, C3, D1 and D2. Without Herbert’s help, I probably wouldn’t have found the right lines. Tip: In preparation, you should try to identify the right lines in advance using the line plan.
The 20 to 30 minutes described in the product description for measuring the lines of a glider seems very optimistic to me, at least for me as an untrained person.
Results
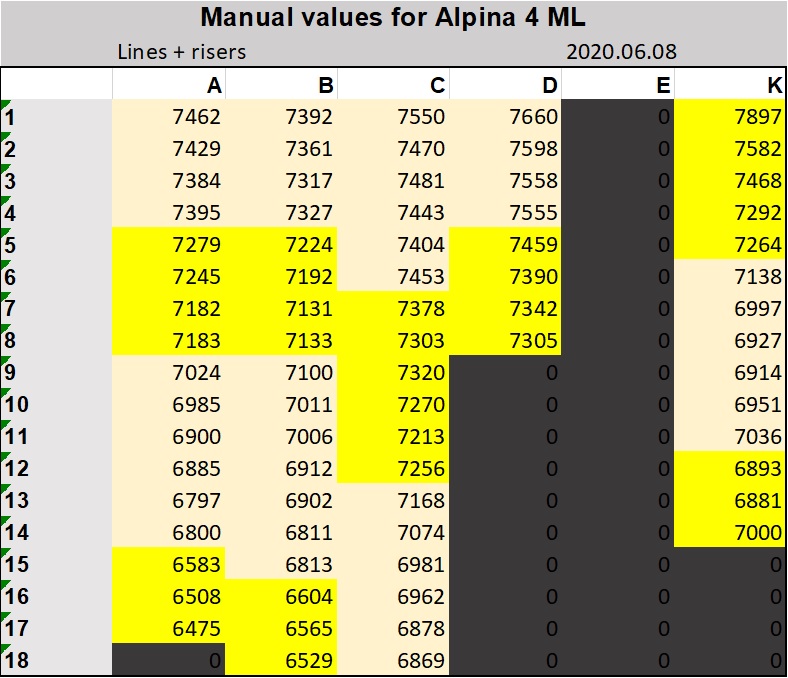
The Excel table below shows the measurement results. Herbert created the Excel spreadsheet and made it available to us, which in principle reproduces the representation of the app. The colouring is done depending on tolerance and correction using conditional formatting.
Unfortunately, I have not found any tolerance information from Ozone for the Alpina 4, so I have given a tolerance of 15 mm. According to ParaFly, the correction should be added to all values to take into account, for example, line locks etc. that were not included in the target values. Again, I was unclear which value to enter here, as you can see below I entered 40 mm.
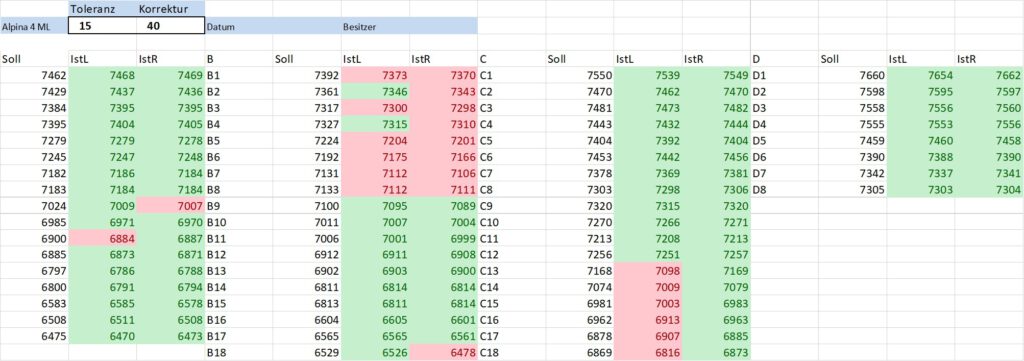
The deviations on the B-plane lines 1 to 8 left and right, and on the C-plane lines 13 to 18 left are striking. It is unclear to me whether I have measured myself, whether the lines are actually trimmed or whether I have selected the wrong values for tolerance and correction. Tip: If not stated on the homepage, ask the manufacturer for the values for tolerance and correction beforehand.
Since I have to send the glider in for a check in April anyway, I will be surprised.
Conclusion
Thanks to Herbert’s support and explanations, the measurement of the line lengths was very instructive for me. On the one hand, I now understand the line diagram better, and on the other hand I can better judge the measurement results of the check. I can recommend everyone to deal with the subject intensively and to check the trim of their own glider.


Dear Oliver,
thank you for the great article.
One additional info for the new version.
In the latest version of the App you can push the back button several times to repeat the measurement for privious line length..
Best regards
Frank
This is a great article, I have the exact same Wing as you, and it needs a trim. I’m thinking about boxing it up and sending it in but I really want to do it myself. I’ve contacted parafly24, but they will not ship to the United states. So I am extremely frustrated.
When you purchased the kit, did it come with the laser range finder, or did you have to order that separately?
Any suggestions as to how I can obtain a measuring kit?
Steve
Hi Steve,
I just checked the trim, but I would never modify the trim of my paraglider. For that, I prefer to send my paraglider to the workshop. I used the kit from my club “bodenlos”, but the kid is delivered complete with the laser rangefinder “Bosch PLR 30 C”. I guess you can order the laser rangefinder everywhere, like e.g. on eBay. The measuring apparatus on the third photo you might be built up by yourself? Biggest problem might the Android app. The app is protected, therefore it is not free to download. Sorry I can’t help you more.
Oliver
Hi Steve,
meanwhile the Cross Country magazin offers a device to check the trim, maybe this is something for you:
https://xcmag.com/shop/product/srs-glider-trimmer/?utm_source=ActiveCampaign&utm_medium=email&utm_content=In+The+Core%3A+3%2C100km+in+Wave+%7C+Storm+Ciar%C3%A1n+Unpicked+%7C+Fly+Forbes&utm_campaign=ITC+%23180+10%2F11%2F2023&vgo_ee=4qxo1Ni8xhhc%2FtuhGlK8EOtDg5XJ%2FEVMTeVeWYKKOrb6BEZ8lA%3D%3D%3Ajosj0Ekg001RsQhWpN3CUlRy9ItR%2F96u
Oliver
Pingback: Rescue throw training with the Bodenlos ones - Ad Nubes - To the clouds