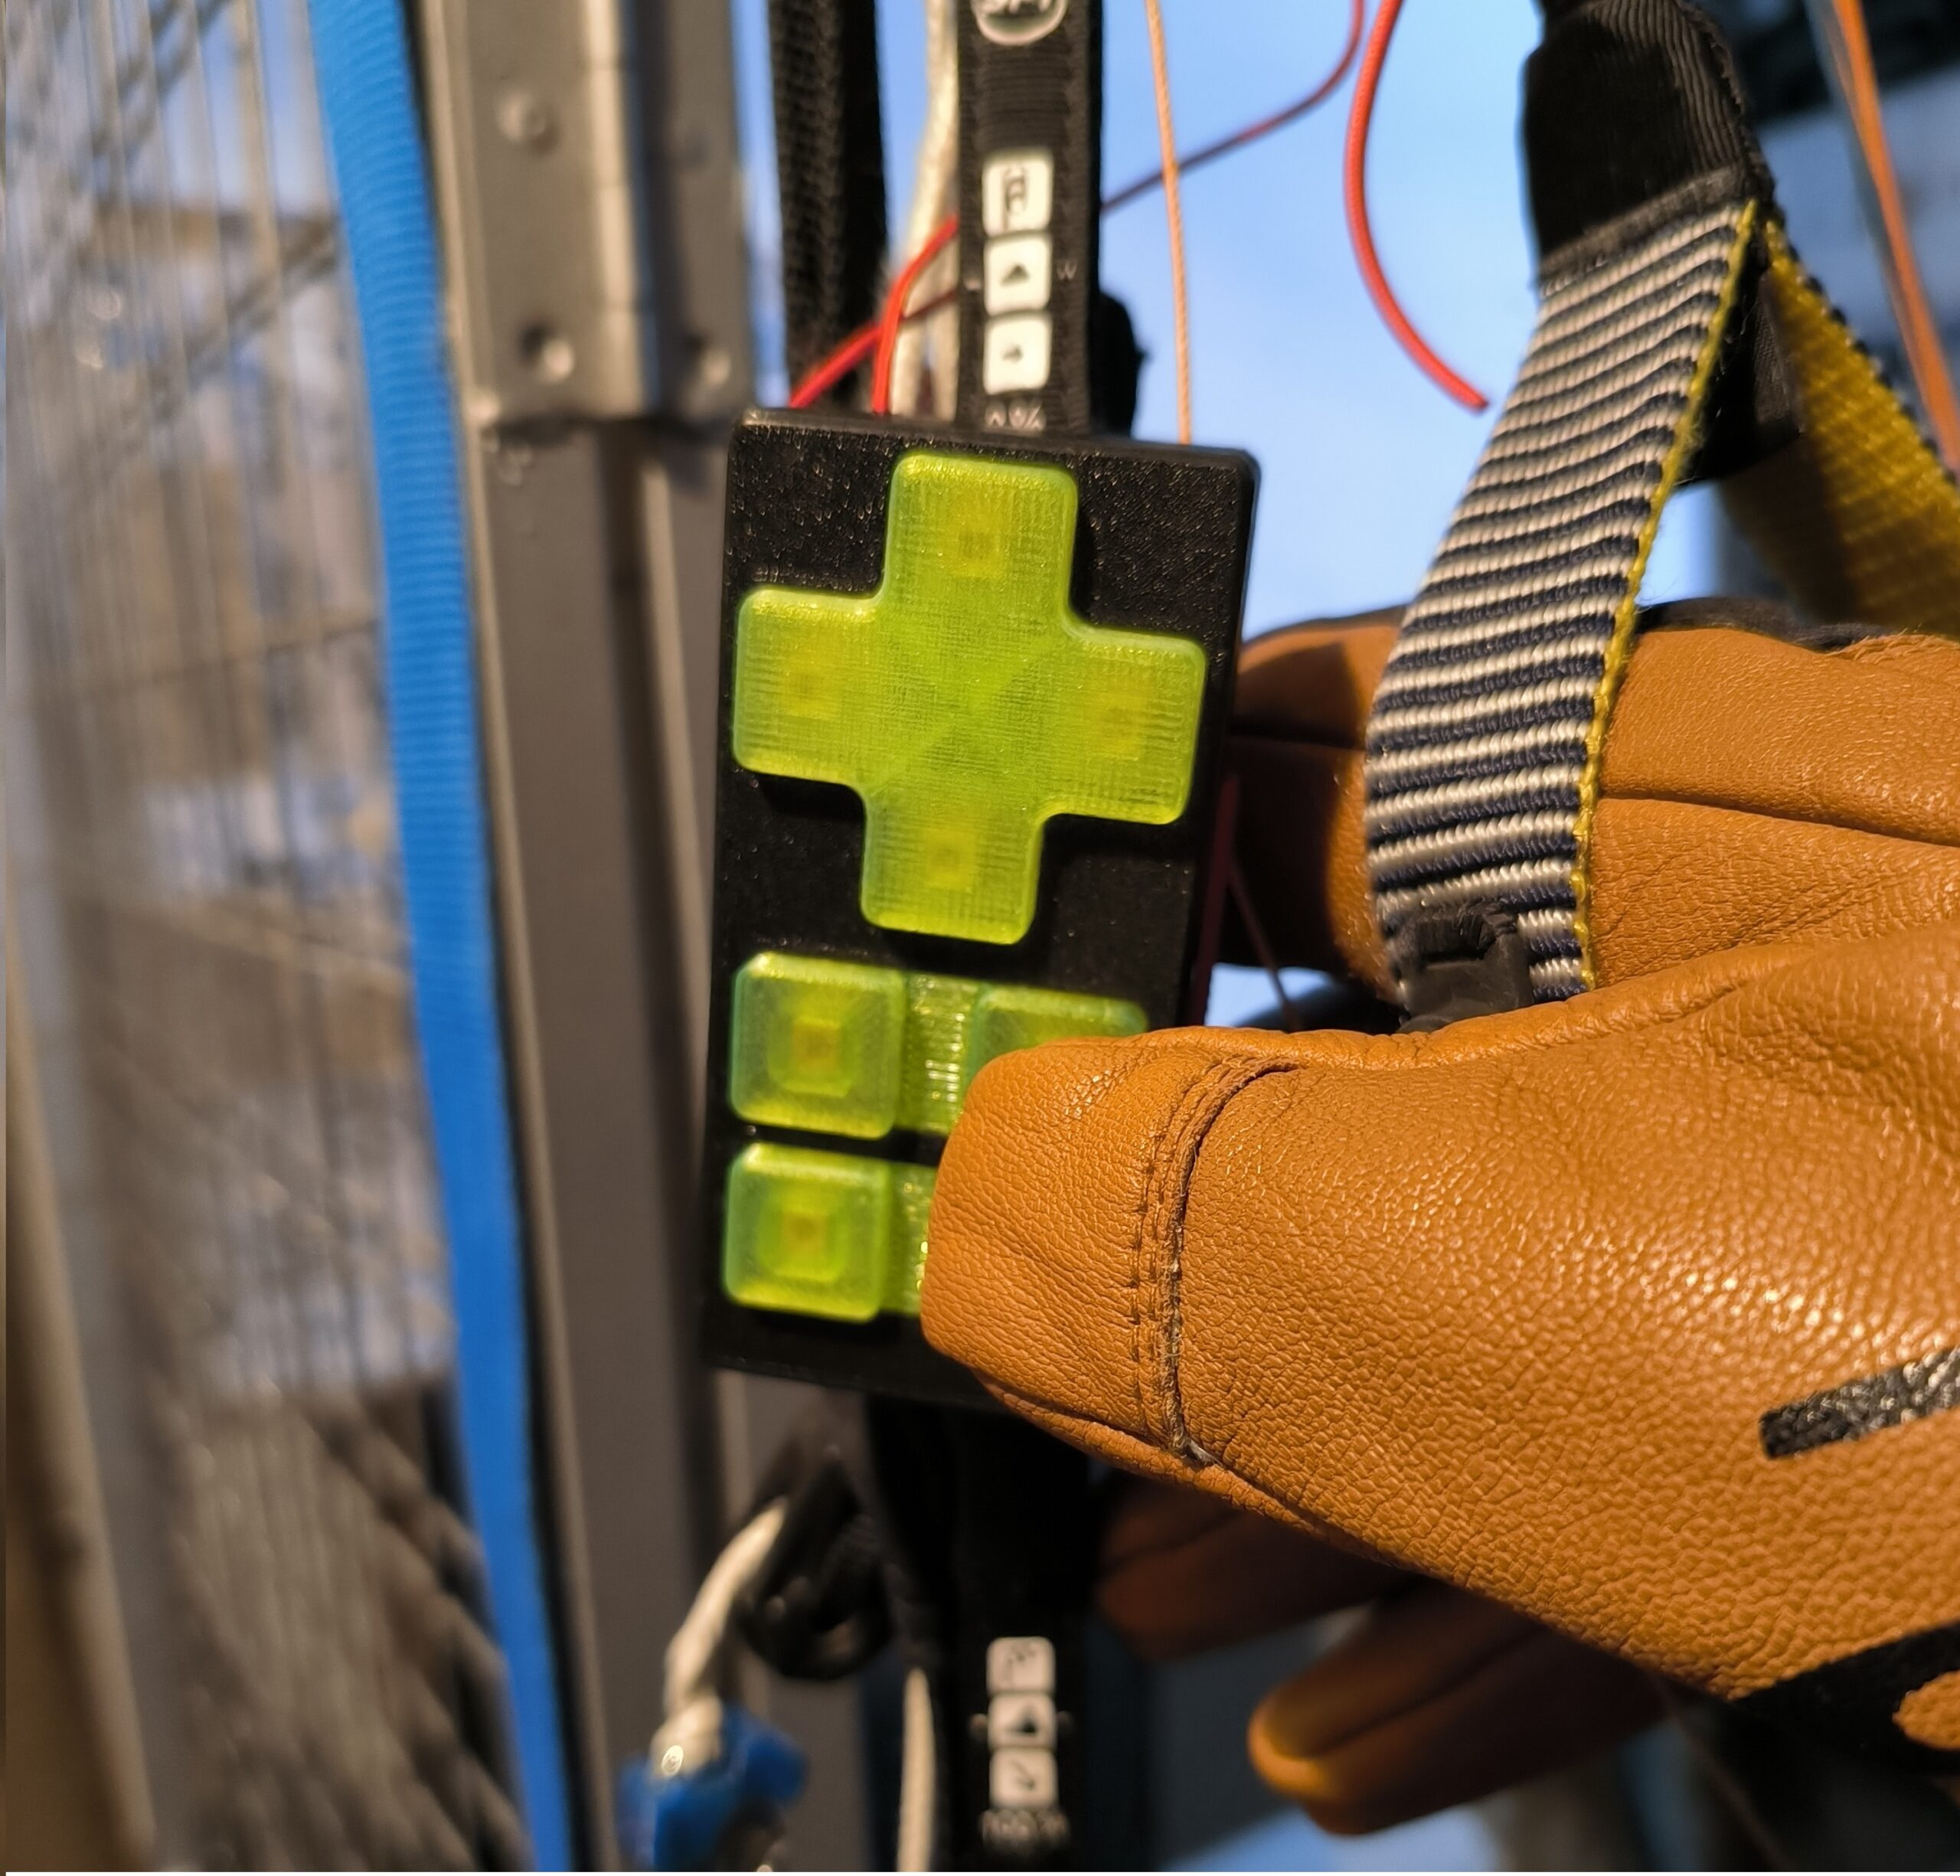
XC Track is now used by many pilots on their smartphones. A major drawback here is the lack of hardware buttons. This makes operation in the air difficult; solutions such as operation with a stylus pen or gloves with a special coating are impractical in the air. A keyboard such as XC Remote promises a…
There is also an Android tablet with XC Track with hardware buttons that is specially made for us paragliders, the AIR 3. The disadvantage here is that you have to let go of the control loop to operate it. I myself have been flying with a remote control for some time, the disadvantage is that only four buttons are available, but otherwise the keyboard has proven itself in flight.
Structure
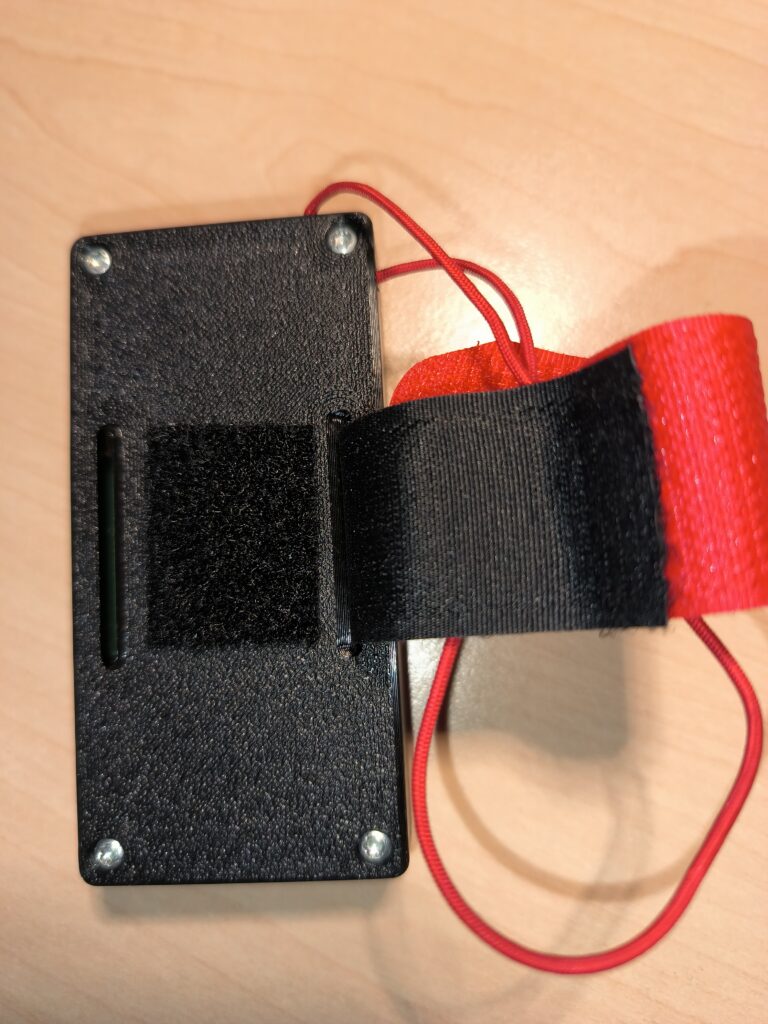
XC Remote offers a total of 8 buttons, 4 buttons are arranged in a cross, the other 4 are paired in pairs. The buttons are large enough to be operated even when wearing thick gloves. It makes sense to mount the keyboard on the risers, in the immediate vicinity of the brakes, so that the keys can be reached without letting go of the brakes (see photo above). A Velcro strap is attached to the keyboard for this purpose, which is routed around the risers. The XC Remote is relatively deep (18 mm), which makes it a little bulky on the riser. If you want to leave the keyboard on the risers when packing, this is not necessarily an advantage.
Raphael Jeger, the developer of XC Remote, offers the keyboard as a do-it-yourself project. However, as I am not able to solder SMD components, I ordered the keyboard from Raphael for a complete price (ask Raphael for the exact price). Included are an Arduino board, battery, a circuit board with buttons and resistors and the housing, completely assembled and ready to use.
Unfortunately, an outdated micro-USB socket is provided for charging. The pressure point of the buttons is very good and can be felt very well even when wearing thick gloves.
Set up
Setting up the keyboard is quite simple. The keyboard must be paired with the smartphone via Bluetooth and the key bindings can be set in XC Track according to your own wishes.
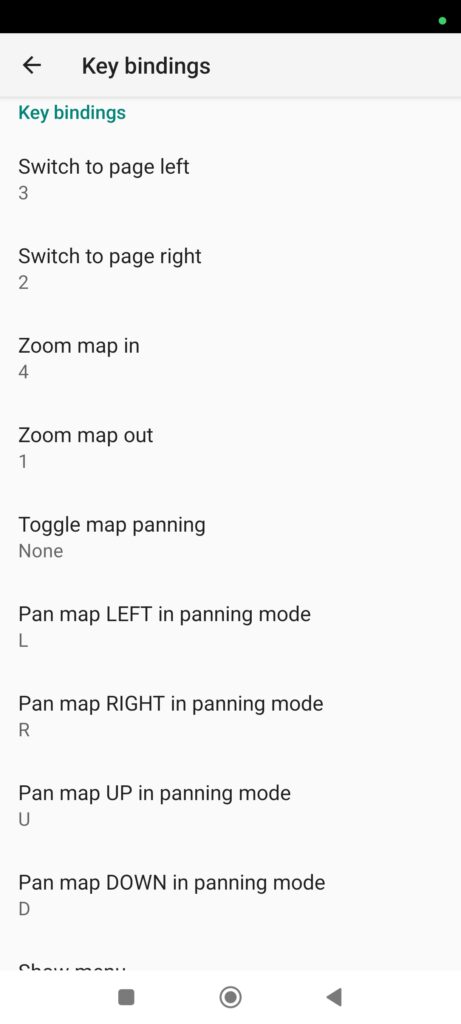
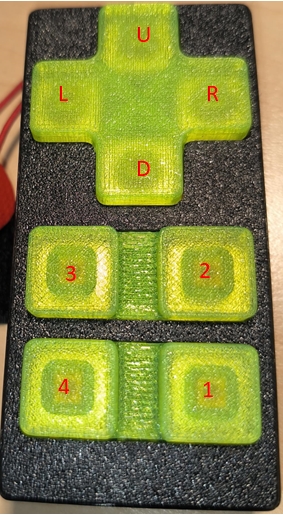
I have set the 4 crossed keys for panning the current map, the centre pair of keys for switching pages left or right and the bottom pair of keys for zooming. It remains to be seen in practice whether I will leave the assignment as it is.
The names of the buttons appear in XC Track as shown in the following illustration.
It can be attached to the risers using the Velcro strap supplied. The loop (red rope) is unfortunately a little short, so that it is not possible to loop it into the risers.
Functions
Keys
The response of XC Track to keystrokes is almost instantaneous. The buttons in the cross have a repeat function so that you can move quickly across the map by simply holding down the button. According to the description, two other buttons are supposed to have the repeat function, but I was unable to verify this.
Power management
According to Raphael, the battery should provide sufficient power for over 1000 hours. According to the specified configuration, the keyboard switches itself off 60 minutes after the last keystroke or one minute after the Bluetooth connection is cancelled.
The charging status can be read from the number of flashes of the LED (next to the USB port). 3 x flashes means charged, 2 x flashes means above normal, 1 x flash means still usable and 10 x means the keypad can no longer be used.
After activating the keyboard with any button and the Power Up button (L button), the Bluetooth connection must first be established manually. The procedure described could be difficult in flight if you forget to do this during the pre-flight check.
Flying
Unfortunately, it has not yet been possible to carry out a practical test due to the weather, but I will report here as soon as a test has been carried out in the air.
Conclusion
The price for the keyboard seems rather expensive at first for a few buttons, but Varios with integrated buttons are considerably more expensive. The advantage here is that you can keep your hand on the brakes.
The keyboard is quite deep, which could be a problem if you leave the keyboard on the shoulder strap.
The micro-USB connection is no longer up to date; the current standard is USB-C. In view of the long battery life (according to Raphael, you don’t need to charge the keyboard during the session), you don’t need an extra micro USB cable when travelling.
Setup is quick and easy. The disadvantage is that you have to establish the Bluetooth connection before every start. The feel of the buttons is very good, even when wearing thick gloves in the cold season.
If you don’t want an expensive vario with hardware buttons and also want to keep your hands on the brakes at all times, the XC Remote is a very good choice. If 4 buttons are enough for you, you should take a closer look at this keyboard as an inexpensive alternative.
